Hey,I’m Elizabeth Zeller, and I’ve been trying to set up QuickBooks Desktop Enterprise 2024 on three computers in our office, but I keep running into problems and honestly starting to feel stuck.
We’re trying to get a multi-user environment going so that more than one person can work in the system at the same time, but the installation process hasn’t been smooth at all. I first installed QuickBooks on our main office PC, and that part seemed okay at first — it launched, asked for the license info, and even opened up the sample file. But things started to get messy when I tried installing it on the second and third computers. On one of them, the installer froze halfway through, and on the other, QuickBooks installed but won’t open properly. In one case, I got a weird error message right after install, and in another, it can’t even find or connect to the company file stored on our shared drive.
I made sure all three PCs are on the same network and I’m using the same license info on all of them, but for some reason, QuickBooks just won’t behave the same way across the devices. I’m also not sure if I’m supposed to install the Database Server Manager separately on the additional workstations or just on the main one. I haven’t gotten any clear answers yet, and the resources I found online are either outdated or super technical.
I don’t know if it’s a permissions issue, a network setting, or just something specific to this new version, but I’d really appreciate some guidance before I spend another day trying to troubleshoot this.
Hi Elizabeth Zeller,
Thank you for sharing such a detailed explanation — it really helps to understand where things stand. You’ve already taken some great steps by installing QuickBooks Desktop Enterprise 2024 on your main office computer, entering your license information correctly, and confirming that all three PCs are connected to the same network. That’s a strong start, and you’re actually well on your way to enabling multi-user access.
Since you’ve run into installation issues on the other two computers and trouble connecting to the shared company file, there are just a few more key things to check and adjust. These include properly setting up hosting roles, sharing the company file folder with the right permissions, and making sure QuickBooks Database Server Manager is installed and running on the main PC only. With a little fine-tuning on these parts, you’ll be able to get all three systems working seamlessly together in a multi-user environment.

Important:
- QuickBooks Desktop 2024 uses the QuickBooksDB34 service to manage company file access.
- QuickBooks Desktop Enterprise supports up to 30 users working in the same file at once.
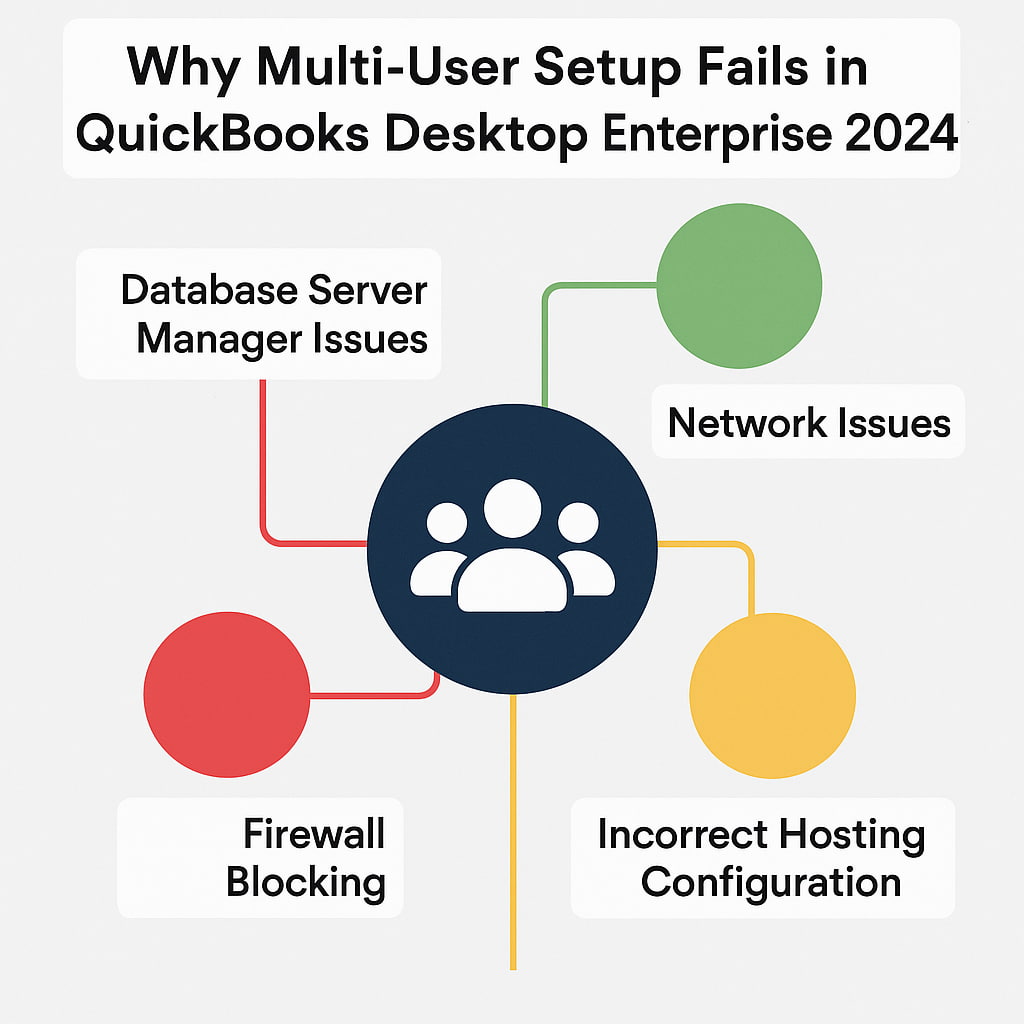
Why Multi-User Setup Fails in QuickBooks Desktop Enterprise 2024?
Multi-user access can be restricted due to network misconfigurations, wrong firewall settings, or improperly assigned hosting roles between computers. There are a few common reasons why you’re getting trouble when setting up multi-user mode in QB Desktop Enterprise 2024.

- Hosting is turned on/off incorrectly on one or more PCs.
- The company file is not stored in a properly shared folder.
- QuickBooks Database Server Manager is not installed or running on the main PC.
- Firewall or antivirus is blocking QuickBooks connections.
- All PCs are not on the same local network.
- Wrong installation type selected during setup on workstations.
- A Network drive to the shared folder is not mapped correctly.
- The file is not opened in multi-user mode from the host computer.
- Insufficient QuickBooks user licenses for simultaneous access.
- Windows file permissions are not properly configured to allow shared access.
Step-by-Step Guide to Setting up Multi-User Mode in QuickBooks Desktop Enterprise 2024 On Different Computers
Setting up multi-user mode in QuickBooks Desktop Enterprise 2024 allows multiple users to work on the same company file at the same time. If you’re working on two or more computers, make sure that the QuickBooks is installed on all the systems but the QB Database server manager should be installed only on the Host PC where the company file is stored.
Method 1: Download & Install QuickBooks Desktop
These steps are used to install QuickBooks on either a dedicated server or computers that access the data on a server. This can also be a Terminal server or a server that hosts both QuickBooks and your company file. When you access your company file from a server, make sure to use the direct path to your company file.
- Make sure you have an active internet connection.
- Open the file QuickBooks.exe.
- Choose Custom and Network Options and then click Next.
- Select the following:
- I’ll be using QuickBooks Desktop on this computer to install on a workstation.
- I’ll be using QuickBooks Desktop on this computer AND I’ll be storing our company file here so it can be shared over our network to install QuickBooks on a server and host files on the same computer. You can use this option to install on a Terminal Server.
- I will NOT be using QuickBooks on this computer. I will be storing our company file here so it can be shared over our network to install only the QuickBooks Database Manager on a server to host files.
- Click Next.
- Select Next to start the installation.
- To change the installation location, select Change the install location then Browse to decide where to keep your QuickBooks folder. Most people put it in their Programs folder.
- When finished, click Open QuickBooks.
After the installation, QuickBooks will ask you to activate and update it.
Method 2: Install QuickBooks Database Server Manager
Install QuickBooks Database Server Manager on the server computer — the one where your company files are stored and shared.
Recommendation: If you’re an accountant or someone who hosts multiple versions of QuickBooks Desktop on your network, install them in order. Install the oldest version first and end with the most recent.
- Close all open programs on your server computer, including QuickBooks.
- Open the install file you downloaded. It’s called Setup_QuickBooks.exe.
- Follow the on-screen instructions.
- When QuickBooks asks you to choose an install type, select Custom or Network Options. Then, click Next. Don’t choose Express.
- Note: The Express option installs QuickBooks Desktop over your previous version of QuickBooks Desktop and you might need your previous version for comparison and troubleshooting purposes.
- Choose the best option for your network setup and click Next. Both options install the Database Server Manager. If QuickBooks Desktop is already installed on your server computer, this won’t overwrite any existing company data.
- Select I’ll be using QuickBooks Desktop on this computer, AND I’ll be storing our company file here so it can be shared over our network if you want Database Server Manager and QuickBooks Desktop on your server computer.
- Select I will NOT be using QuickBooks Desktop on this computer if you only want Database Server Manager on your server computer.
- Follow the rest of the on-screen instructions.
- Once done, select Install. Windows may ask you for permission.
Note: QuickBooks creates a new Windows user for each version of Database Server Manager. For instance, Database Server Manager 2023 shows up as QBDataServiceUser33.
Give QBDataServiceUserXX (where XX represents the QuickBooks version number) permission to access the folders that hold your company files. You may see these users whenever you set system-level permissions and it is essential for multi-user functionality.
Method 3: Set Folder and Windows Access Permissions
When setting up multi-user in Quickbooks Desktop, save your company files on your server computer’s local hard drive. This makes it easier to share them over your network. Check the folder permissions on your server computer, so we can make sure that the folder holding your company files has permission to be on your network.
- Hit a right-click on the folder storing the company file.
- Navigate to Properties.
- Select Security and Edit.
- Choose QBDataServiceUserXX and click Full Control.
- Press Allow.
- Click Apply, and hit the OK button.
When you’re ready, follow these instructions below:
- Hold and Press Windows + E keys to open File Explorer.
- Locate and right-click on the folder containing your company files.
- Go to Properties > Sharing > Shared Add.
- Select the corresponding QBDataServiceUserXX for your version.
- Set the permission level to Full Control for both users and click Share.
Method 4: Enable Hosting On Multi-user Mode
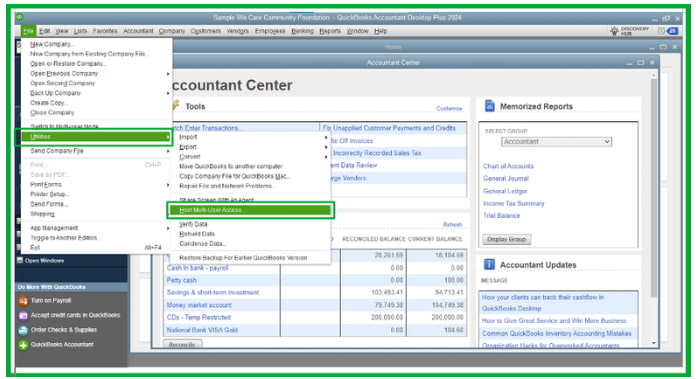
Enable the Hosting only on the host computer to give other systems access to your QuickBooks company file and it should always be connected when others need access.
- Navigate to the File menu in your QuickBooks Desktop.
- Choose Utilities.
- Select Host Multi-User Access.

- Click Yes.
Method 5: Map a Network Drive in Windows
You can access a folder stored on another drive, server, or computer over a network when you map a network drive. Mapping makes it easy for you to access QuickBooks company files from the shared storage.
For Windows 11:
- On your keyboard, press the Windows icon.
- Enter This PC in the search bar. From the search results, choose This PC.
- Select More (…) then select Map network drive.
- Note: If you don’t see Map network drive, you can right-click This PC and select Map network drive.
- Select a drive letter in Drive.
- You can either:
- enter the full path of the folder you want to map or
- enter only the path to the computer the file is hosted form and select Browse to find the folder
- Select Reconnect at sign-in to keep the drive mapped every time you sign in to your computer.
- Select Finish.
For Windows 10:
- On your keyboard, press the Windows icon.
- Type This PC in the search bar. From the search results, choose This PC.
- Under the Computer tab, select Map a network drive.
- Select any unused drive letter then select Browse.
- Go to the network location where your QuickBooks company file is stored.
- (Note: If you’re having trouble mapping the network drive using the UNC, try using the IP address of the server.)
- Select OK then Finish.
- Reopen your QuickBooks company file from the new mapped drive.
Method 6: Check the Network Connectivity
- Hold and Press Windows + R, type // [Host (Computer Name], and click Enter.
- Replace [HostComputerName] with the name of your host computer.
- Verify both computers are on the same network in case it doesn’t open.
- Locate the folder with your QuickBooks company file and confirm access.
Method 7: Open Company File in Multi-User Mode Automatically
There are two ways to open company files in Multi-user mode automatically. The first one is to check the Open file in the multi-user mode option.
- Go to the File menu.
- Choose Open or Restore Company.
- Select Open a company file, and click Next.
- On the Open a Company window, check the Open file in multi-user mode box at the bottom.
Each time you open the company file from the computer, the multi-user mode will be enabled. You can do this on every workstation.
The second one is to edit the QBWUSER.INI file and then change the MULTIUSERMODE value.
- Navigate to the AppData folder. The default location is: C:\Users\(username)\AppData\Local\Intuit\(Your QuickBooks Desktop version)
- Locate QBWUSER.INI and open it using Notepad.
- Press CTRL + F and find MULTIUSERMODE.
- Change the value to “Y” (MULTIUSERMODE=Y).
- Once done, save the file.
When the system reverts the file to the original value, do this:
- Hit right-click on the QBWUSER.INI file.
- Select Properties.
- Hit the General tab.
- Check the Read-only box.
- Click Apply, and Save.
Tips to Prevent Multi-User Setup Issues in QuickBooks Desktop Enterprise 2024
From choosing the right installation options to adjusting firewall settings and folder permissions, each step plays a crucial role in how smoothly your multi-user environment will function. Follow these pointers carefully to avoid the most common issues users encounter during multi-user setup in QB Desktop Enterprise 2024.
- Use the latest version of QuickBooks Desktop Enterprise 2024 on all computers.
- Install QuickBooks Database Server Manager only on the host (main) computer.
- Ensure all three PCs are connected to the same local network (Wi-Fi or LAN).
- Place the company file in a shared folder on the main computer and give full access to all users.
- Turn on hosting only on the main Host computer.
- Turn off hosting on the other two PCs or workstations.
- Confirm that your Windows user accounts have the necessary permissions to access shared folders.
- Map the shared folder as a network drive on each workstation for reliable file access.
- Add QuickBooks and the QuickBooks Database Server Manager as exceptions in your firewall and antivirus settings.
- Make sure you have enough user licenses for all three users to work at the same time.
Final Note!
Elizabeth, this is not your fault — the multi-user setup in QuickBooks Desktop Enterprise 2024 can be tricky, even for experienced users. The newer version has some tighter rules around permissions and network access, which can make the process feel frustrating.
But you’re handling it with calm and determination, and that already shows you’re on the right path. With just a few clear steps, you’ll have all three systems connected and working together smoothly — and you won’t have to do it alone. We’re here to guide you through every part of the process until everything runs just the way it should.
Disclaimer: The information outlined above for “Can I Set Up a Multi-User Environment in QuickBooks Desktop Enterprise 2024?” is applicable to all supported versions, including QuickBooks Desktop Pro, Premier, Accountant, and Enterprise. It is designed to work with operating systems such as Windows 7, 10, and 11, as well as macOS.
