Hey everyone, I’m Jennifer, and I’m hoping someone out there can help me figure this out — I’ve been using QuickBooks Desktop 2024 to manage my small business finances, and after a recent QB update (pretty sure it was pushed automatically about a week ago), I started noticing that some of my previously recorded check transactions missing entirely or showing up blank.
I first caught it while I was prepping for my monthly reconciliation. I noticed that 3 vendor checks I wrote last month weren’t showing up in the bank register — and the strange part is, the check numbers are still listed, but there’s no associated payee, no amount, no memo — basically just a ghost entry.
I didn’t delete anything, and no one else has access to the file. We don’t sync with any third-party apps either, so I ruled that out.
Here’s what I’ve tried so far:
Ran Verify Data – it did detect issues but didn’t give specific errors.
Followed up with a Rebuild Data, which completed, but the missing check info didn’t come back.
Checked audit trail – nothing flagged or deleted for those checks.
Searched for backups, but we’ve entered so many new transactions since then that I’m hesitant to restore and risk losing current data.
I also tried toggling filters in the check register and even pulled custom reports to see if the data just got moved or filtered out, but no luck.
This has completely thrown off our reporting and vendor balance tracking. I rely on QB for monthly and quarterly closeouts, and now I’m second-guessing every record.
Honestly, I feel stuck. I don’t want to call support and sit on hold for hours if there’s something I might’ve missed that others have figured out already.
Has anyone else using QuickBooks Desktop 2024 run into check transactions going blank or disappearing after an update?
Did restoring from a backup fix it for you? Or is there any way to recover just those missing transactions without wiping out weeks of new entries?
Hey Jennifer — first of all, you’re doing everything right.
It can be incredibly frustrating to open your company file and find that some of your previously recorded check transactions are missing or showing up blank, especially right after a recent QuickBooks Desktop 2024 update.
You mentioned spotting the issue during your monthly reconciliation, when you realized that three vendor cheques you had entered last month had turned into ghost entries. The cheque numbers still appeared in your bank register — but with no payee, no amount, and no memo.
After trying every standard troubleshooting step — including run Verify Data and Rebuild Data, review Audit Trail, check bank register filters and custom reports and even look for backup options— the problem persisted. This kind of diligence is exactly what most users skip, and it shows how committed you are to keeping your records clean and your business on track.
The good news? Even though the standard repair tools didn’t resolve the issue, there are advanced recovery steps you can try — and in most cases, they can help you either restore the missing check details or re-enter them safely without wiping out weeks of new entries.
What’s Going On With Your Cheque Transactions?
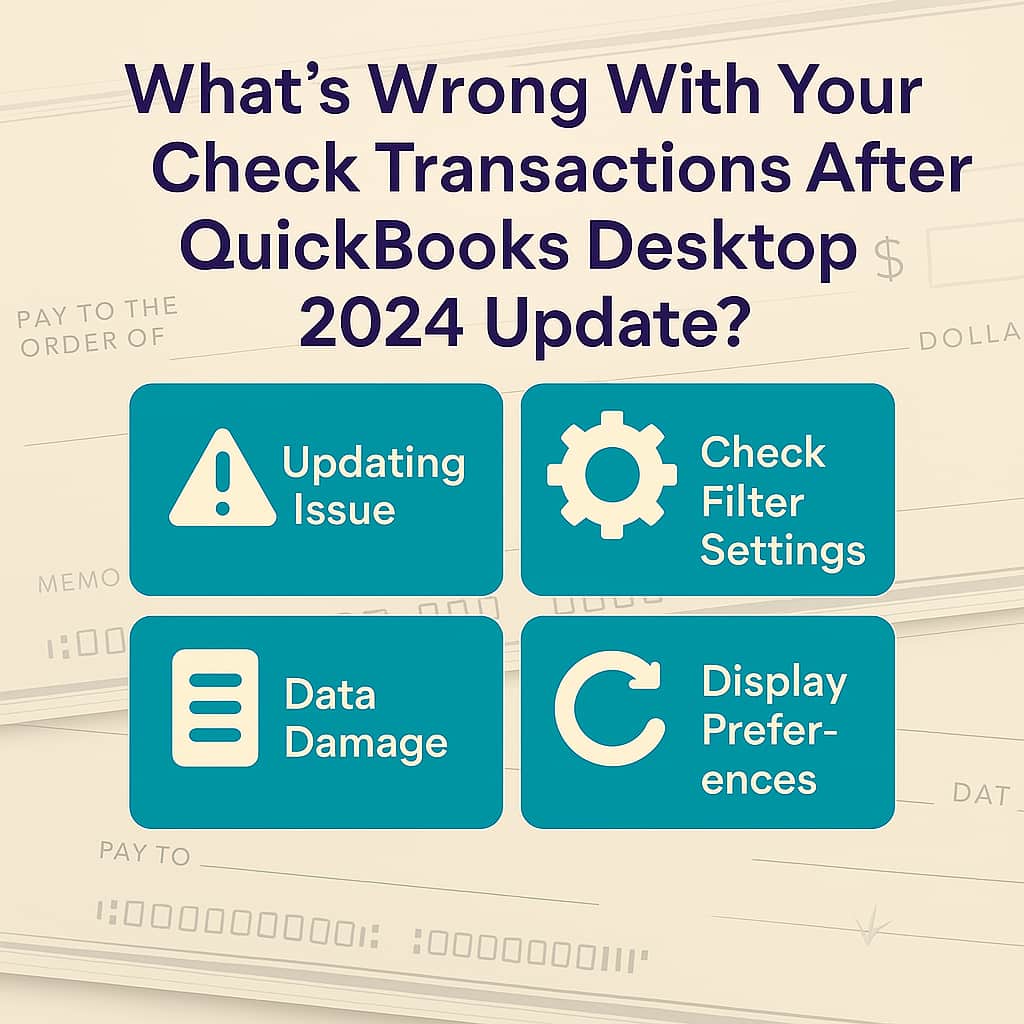
After a recent automatic update in QuickBooks Desktop 2024, users have reported the following issues with cheque transactions:
- Cheques are no longer visible in the bank register.
- Cheque numbers appear, but the payee name, amount, and memo fields are blank.
- The transactions show up as empty or ghost entries.
- The Audit Trail shows no deletions or edits.
- No third-party sync tools are involved.
Reasons For Missing or Blank Cheque Transactions in QuickBooks Desktop 2024
This issue often occurs due to display glitches, minor data corruption, or filters that unintentionally hide your entries.
Following are major causes leading to missing or blank cheque transactions in QuickBooks Desktop 2024:
- File corruption introduced during or after an automatic QuickBooks update.
- Cheque templates or forms not displaying correctly because of damaged preferences.
- QuickBooks might have difficulty accessing some parts of your company file, preventing check details from showing up.
- Or, in rarer cases, undetected corruption that’s not flagged by Verify/Rebuild.
Still Missing Cheque Info in QuickBooks Desktop 2024? Try These Advanced Fixes
Jennifer, if your check transactions still aren’t showing up after the usual repair steps, it could be a sign of deeper data issues or just a display glitch that needs a closer look. There are some advanced methods you can try to recover the missing data without putting your existing entries at risk.
Method 1: Update QuickBooks Manually
Regular updates ensure access to the latest tools, automation, performance improvements and critical security patches that protect your financial data from vulnerabilities and cyber threats.
- Close your company files and the QuickBooks desktop program.
- Navigate to the Windows Start menu.
- Search for QuickBooks Desktop and right-click on the icon and choose Run as administrator.
- Under the No Company Open window, select the Help menu and click Update QuickBooks Desktop.
- Click Options > choose Mark All > Save.
- Navigate to the Update Now tab and tickmark the Reset Update checkbox.
- Select Get Updates.
Method 2: Run the QuickBooks File Doctor Tool
Running the Quick Fix My File and making use of QuickBooks File Doctor tool helps you to auto-detect and auto-fix data damage issues within QuickBooks.
Step 1: Run Quick Fix My File
- Download and install the most recent version (1.6. 0.8) of QuickBooks Tool Hub.
- Choose Company File Issues from the tool hub.
- Select Quick Fix My File.
- Click OK when it completes, and open your QuickBooks.
Step 2: Run QuickBooks File Doctor
- Choose Company File Issues from the tool hub.
- Select Run QuickBooks File Doctor. It may take up to one minute for the file doctor to be opened.
- Note: Look for QuickBo company file from thoks Desktop File Doc and open it manually in case the QuickBooks File Doctor doesn’t open.
- In QuickBooks File Doctor, choose youre drop-down menu.
- Note: Click Browse and search to find your file when you’re unable to see your file.
- Click on Check your file (middle option only) and select Continue.
- Enter your QuickBooks admin password and click the Next tab.
Scan time depends on the file size and usually takes 10–15 minutes. Even if the scan result shows as unsuccessful, it may still resolve underlying issues. Once the scan completes, open QuickBooks and access your company file to verify the fix.
Method 3: Check the QBWin.log or QuickBooks.log files
QuickBooks Desktop records program messages and errors—including information created by the Verify, Rebuild, and Condense Data tools—in a file called QBWin.log. Each QuickBooks version has its own QBWin.log. Every time you open QuickBooks, it renames the old QBWin.log file and creates a new one.
Access QBWin.log on Summit Hosting or other Hosted Environment
For QuickBooks Desktop Pro/Premier Users
- From the Start menu of your Hosted or Terminal environment, select Computer.
- Type QBWin.log on the search menu. Do not press Enter or click the magnifying glass icon.
- A list of QBWin.logs will populate. Look for the QBWin.log that has the latest timestamp.
For QuickBooks Enterprise Solution Users
- Hold and Press F2 or Ctrl+1 to open the Product Information window on the QuickBooks Home page.
- Press F3 or Ctrl+2 to open the Tech Help window.
- Choose the Open File tab.
- Select QBWin.log and click Open File.
Method 4: Create a Custom Transaction Detail Report
Let me show you how to generate the customized Customer Transaction Report you need. It gives you a clear view of all customer activity, so you can easily track payments, spot discrepancies, and stay on top of your accounts receivable.
- Navigate to Reports, Custom Report, and choose Transaction Detail.
- Select Customize report.
- Enter the Report Date Range.
- Under the Columns area, uncheck these things: Memo, Account, Class, Clr, Split, Debit, Credit, and Balance.
- Hover over the Filters tab and type “TransactionType” in the search bar, and then choose it from the list.
- In the drop-down menu, click Checks instead of all transactions.
- Press OK.
- Choose the Refresh option so that the changes can be reflected.
- After following these steps, you should have the Date, Check Number, Payee, Check Amount.
Method 5: Check the Reconciliation Status
Checking the reconciliation status can help you find out if the missing or blank cheque entries were mistakenly marked as reconciled, filtered out by reconciliation settings, or damaged during the process—causing them to disappear from reports or registers.
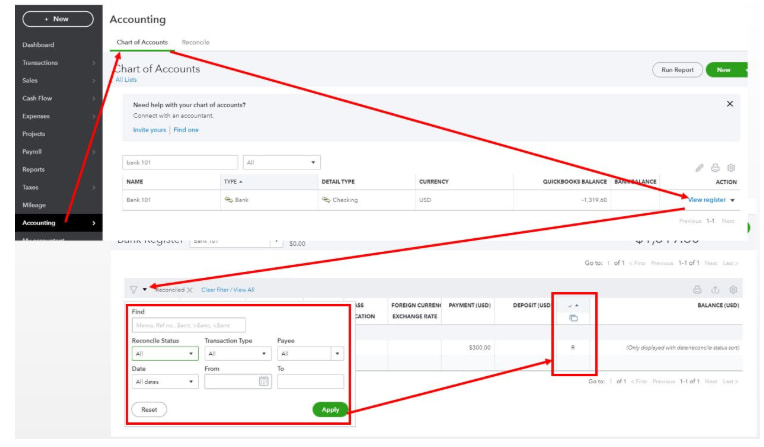
- Navigate to Accounting > Chart of Accounts.
- Choose the View register link of the bank account.
- Select the funnel icon and filter it by Reconcile Status, Transaction Type, Payee, and Date.
- Click Apply.
- Locate the transaction and check if you see the letter R under the Reconcile Status (indicated by a check mark) column. This means Reconciled.
- Edit the transaction if required and click Save.
Method 6: Recover lost data with QuickBooks Auto Data Recovery
QuickBooks Desktop has a feature called Auto Data Recovery (ADR) designed to recover all of your lost or corrupted data. It helps you to restore your lost file by:
- Restoring lost transactions using your current Transaction Log file (.TLG) and a copy of your Company file (.QBW).
- Restoring all but the last few hours of transactions with a copy of both your Company file and your Transaction Log file.
Recover recent transactions using the original .TLG file with .QBW.adr file
Use the original Transaction Log file along with the ADR version of the company file to recover all recent transactions.
- Create a new folder on your Desktop and name it “QBTest.”
- Open the folder where the company file is stored.
- Tip: You can check the location of the company file on the Product Information screen (press F2 or Ctrl+1 on your keyboard) and No Company Open Window.
- Search for the .tlg file in your company file’s folder. It has the same name as your company file.
- If you’re unable to identify the .tlg file, perform these to show file extensions.
- Press Windows+E on your keyboard to open File Explorer.
- Choose Organize and select Folder and search options.
- Select Hide extensions for known file types.
- Click Apply and OK.
- If you’re unable to identify the .tlg file, perform these to show file extensions.
- Copy the corresponding .tlg file of your company file, and paste it to the QBTest folder on your Desktop.

- Open the QuickBooksAutoDataRecovery folder. It is in the same location as your company file.
- Copy the .QBW.adr file and paste it to the QBTest folder. You must now have a .QBW.adr and .tlg file on your QBTest folder.
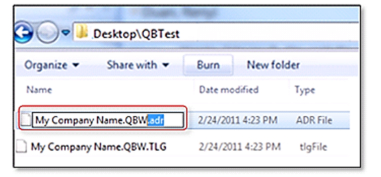
- In your QBTest folder, right-click on the .QBW.adr file and click Rename.
- Delete .adr at the end of the file.
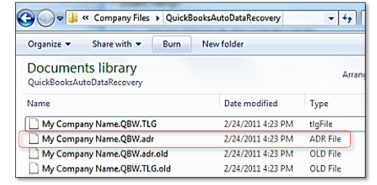
- Open QuickBooks.
- Go to the company file saved on your QBTest folder. Use your account register to verify all transactions are there.
- Select File > Utilities > Verify Data to check the data integrity of the recovered file.
- Move the damaged company file to a different location and replace it with the healthy copy from the QBTest folder if this copy of the company file is working properly.
Recover recent transactions using .QBW.adr and .TLG.adr files
This method uses the ADR versions of both the .QBW and .TLG files to recover everything except the last 12 hours of transactions.
- Create a new folder on your Desktop and name it “QBTest.”
- Open the folder where the company file is saved and search for the QuickBooksAutoDataRecovery folder.
- Tip: You can check the location of the company file on the Product Information screen (press F2 or Ctrl+1 on your keyboard) and No Company Open Window.
- Look for the .TLG.adr and .QBW.adr files. These files have the same name as your company file.
- If you’re not able to identify the .TLG.adr and .QBW.adr files, perform these steps to show file extensions.
- Hold and Press Windows+E on your keyboard to open File Explorer.
- Choose Organize and select Folder and search options.
- Select Hide extensions for known file types.
- Click Apply, and OK.
- If you’re not able to identify the .TLG.adr and .QBW.adr files, perform these steps to show file extensions.
- Copy the .TLG.adr and .QBW.adr files and paste them to the QBTest folder.
- On your QBTest folder, remove the .adr extension from the end of the file name. You should now have both a .QBW and a .TLG file in the folder.
- Open QuickBooks.
- Navigate to the company file saved on your QBTest folder. Use your account register to verify all transactions are there.
- Select File > Utilities > Verify Data to check the data integrity of the recovered file.
- Move the damaged company file to a different location and replace it with the healthy copy from the QBTest folder if this copy of the company file is working properly.
Tips to Avoid Missing or Blank Cheque Entries in QuickBooks!
- Set QuickBooks to create regular backups.
- Store your backup files on an external drive or secure cloud storage to protect against local hardware issues.
- Reconcile your accounts and review transaction logs consistently to catch discrepancies early.
- Disable automatic updates and consider updating manually after reviewing patch notes.
Final Thoughts!
Jennifer, the “blank cheque entry” issue in QuickBooks Desktop 2024 is most likely due to a data inconsistency after the update—but in most cases, it’s completely fixable. Whether it’s a hidden display error, a corrupted file fragment, or an incomplete update process, the steps we’ve covered can help you recover your records without losing your current data.
Yes, this situation is frustrating — especially when it throws off your reporting, disrupts your vendor tracking, and leaves you questioning the reliability of your tools. But here’s what matters most: your data isn’t lost — it’s just hidden, mislinked, or temporarily unreadable. And the fact that you’ve already taken the right first steps means you’re ahead of the curve.
With the advanced tools, recovery options, and report customization methods we’ve walked through, there’s a very strong chance your data can be restored. Let me know if you need any help drafting an email to Intuit, preparing the ADR test environment or simply reviewing results from your QBWin.log, I’m right here and ready to assist you every step of the way.
Disclaimer: The information outlined above for “Why Are My Check Transactions Missing or Showing Blank After Updating QuickBooks Desktop 2024?” is applicable to all supported versions, including QuickBooks Desktop Pro, Premier, Accountant, and Enterprise. It is designed to work with operating systems such as Windows 7, 10, and 11, as well as macOS.
