QuickBooks Error H101 occurs when the software encounters issues while accessing a company file hosted on another computer in a network. This hinders the multi-user connection process.
QuickBooks Error H101 is caused by incorrect or missing configurations in the host file, Windows Firewall’s faulty setups, problems with DNS settings, and inability to connect to the server.
Ensure proper host settings, set up the Windows Firewall, check DNS settings, utilize the QuickBooks Connection Diagnostic Tool, and restart pertinent services like QBDBMgrN and QBCFMonitorService to fix QuickBooks Error H101.
What Does QuickBooks Error H101 Indicate?
QuickBooks error H101 occurs when users try to access their company file on another device, resulting in a technical glitch. This error is caused by incorrect QuickBooks configuration or hosting settings.
Generally, you may experience QuickBooks error H101 at the time of accessing the company file that has been placed on another system. Additionally, the same error may pop up while trying to switch QuickBooks from single-user mode to multi-user mode, mean something is blocking the multi-user connection to your server. you can follow the below-mentioned solutions for fixing the same error code.
Reason Behind Why QuickBooks Error H101 Occurs
QuickBooks error H101 occurs when something blocks the multi-user connection between the workstation and server system. This happens because the Host Multi-User Access option is enabled on workstations. It should be enabled only on the server system hosting the company file.
We’ve listed the main causes of QuickBooks Error Code H101 to provide knowledge of the major contributing factors:
- IP Address Issues: QuickBooks encounters connectivity issues because it cannot gather data or has an erroneous device IP address.
- Incorrect host settings: Misconfigured host settings in QuickBooks might cause the H101 error notice, which breaks up network connections.
- Blocking Windows Firewall: Windows Firewall configurations hinder QuickBooks’s operation by preventing appropriate network access and communication.
- Inaccessible Data File Path: Incorrect or unavailable corporate data file paths prohibit QuickBooks from finding necessary files.
- Error in Network Data File: Damage or error in the Network The opening of the firm file on a separate network is hampered by data files.
- Unresponsive QuickBooks Services: There are connectivity problems due to QuickBooks services like QBDBMgrN and QBCFMonitorService not operating on the system.
Key Takeaways: QuickFix:
We’ve specified the reasons for the particular QuickBooks problems and their related fixes. This thorough approach gives you a better understanding of the real problems and the necessary actions to improve them properly.
- Cause: QuickBooks has connectivity issues due to misconfigured or unreachable device IP addresses.
- Solution: Make sure the IP address matches the network settings by checking and making the necessary corrections.
- Cause: Network connections break off due to incorrect host settings in QuickBooks, which causes the H101 issue
- Solution: Examine and modify host settings to align with the Network and enable effective communication.
- Cause: QuickBooks cannot properly access the Network due to limitations imposed by the Windows Firewall.
- Solution: Fix connectivity issues by configuring Windows Firewall settings to allow QuickBooks network access.
- Cause: QuickBooks has trouble locating important files due to inaccurate or unavailable corporate data file paths.
- Solution: Ensure the proper data file path is set in QuickBooks to allow easy access and usage.
- Cause: Opening the corporate file on a different network may be complicated by problems with the Network Data File.
- Solution: Repair or regenerate the Network Data File to restore appropriate capability for accessing the corporate file on various networks.
- Cause: Connectivity problems are caused by applications like QBDBMgrN and QBCFMonitorService not working properly on the system.
- Solution: Restarting and checking that these crucial QuickBooks services operate will guarantee effective network access and data sharing.

How to Fix QuickBooks Error Code H101?
Numerous solutions for resolving QuickBooks Error Code H101 can be found on the web. Here, we list all the relevant solutions that can be performed to fix the same issue easily.
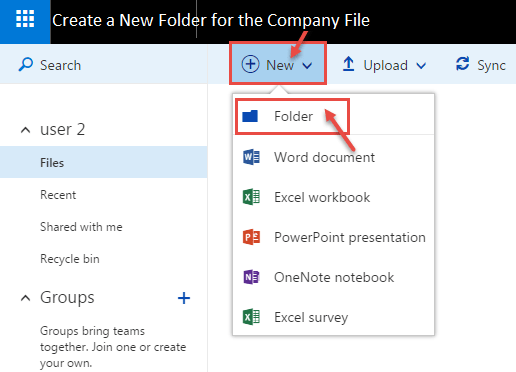
Solution 1: Create a New Folder for the Company File
- Firstly, you are required to create a new folder and share it on the Hosting PC.
- Then, set Windows to get the entry to share the company files.
- After that, copy the. QBW file to the new folder.
- Lastly, try to use the company file in the multi-user mode.
Solution 2: Checking QuickBooks Hosting
- Firstly, launch the QuickBooks software on each workstation.
- After that, click on the File menu and select Utilities.
- Next, run the file in multi-user mode on each workstation.
- Choose the Stop Hosting tab for Multi-User Access.
- Finally, repeat the above steps for each workstation.

Solution 3: Checking QuickBooks Services
- Initially, press and hold the Windows + R keys to launch the Run box.
- After that, type Services. MSc and press the Enter key.
- Now, search for the QuickBooks DBXX service in the service window.
- Ensure the Startup Type and Service Status is active.
- Go to the Recovery tab and then choose the ‘Restart the Service’ for the first failure.
- Now, choose Ok to save the changes.
- Repeat the aforementioned steps for the QBCF monitor service.
- Finally, access QuickBooks on each workstation in multi-user mode.
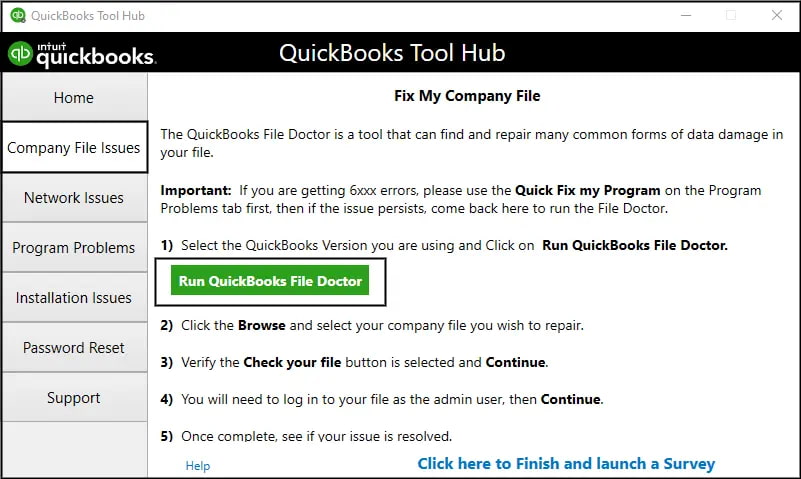
Solution 4: Use the QuickBooks File Doctor Tool
- The first thing you need to do is to launch QuickBooks and then open the tool hub.
- After that, click on Company File Issues from the tool hub.
- Next, select the Quick Fix my File option.
- Once you are done with the process, press OK.
- Finally, try to launch the software again.
Solution 5: Access the QuickBooks Database Server Manager
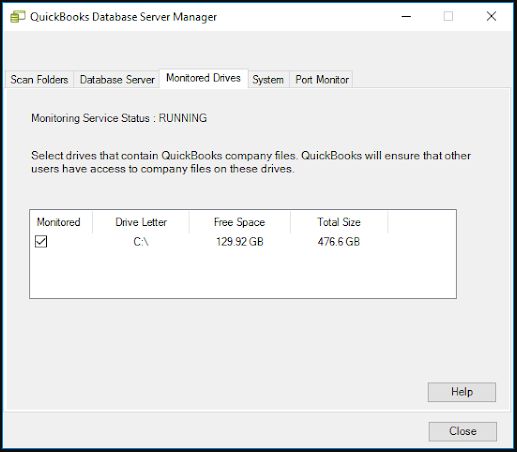
Before accessing the database server manager, you are required to download and install the tool hub. After that, you can follow the steps written below to run it.
- Firstly, double-click on the QuickBooks Tool Hub to launch it.
- After that, go to the Network Issues tab and choose the QuickBooks Database Server Manager.
- Now, you will be directed to the company file location where you need to choose the Start Scan. Option.
- If you don’t find the company file, click Browse and then select Start Scan.
- Then, the firewall start repairing via QuickBooks Database Server Manager.
- You need to allow permissions to access all workstations.
- Once you are done with the repairing process, select Close.
- Launch QuickBooks where the QB Error Code H101 is appearing.
- Finally, use the company file in Multi-User Mode.
Solution 6: Configuring the Firewall Settings
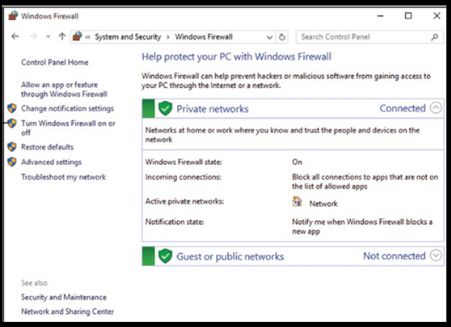
- Initially, hold the Windows + R keys to launch the Run command.
- And then, type Control in the search bar and press OK.
- Select the System and Security option and then choose the Windows Defender Firewall.
- After that, select the Allow option via Windows Defender Firewall.
- Finally, choose OK.
Solution 7: Changing the Path of the Company File
Here are the steps to change the location of the company file.
- The first step is to create the company file folder.
- After that, you need to copy & paste the company file (.QBW) into the new folder.
- Launch QuickBooks and the go to the File.
- Next, click on the Open or Restore Company option.
- Choose the Open a Company File option and then press Next.
- Finally, browse to the location where the file has been saved and then choose open.
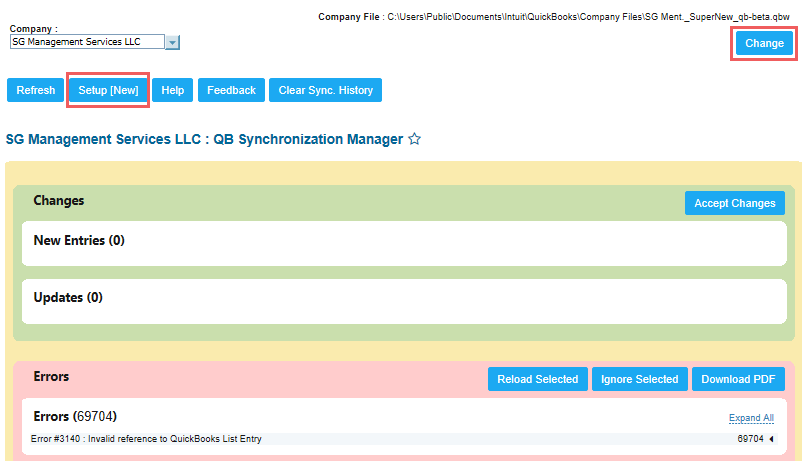
QuickBooks errors, like the H101 error, can interrupt and stop you from opening the QBW file in a multi-user environment. That’s why we have mentioned the reasons that can trigger this QuickBooks error and their possible solutions to troubleshoot and resolve this error effectively.
If there is corruption in the QBW file, then try a professional QuickBooks solution, such as ebtterbooks. We can repair highly corrupted QBW files and restore all your data with complete integrity. The above-given problems and solutions can really help you troubleshoot the QuickBooks error H101.
FAQs!
What is Error Code H101 in QuickBooks Desktop?
Error Code H101 in QuickBooks is a network-related issue that occurs when the software cannot establish a connection with the company file. It typically arises due to hosting or network configuration problems, hindering multi-user access. Resolving this error is essential for uninterrupted collaborative accounting within QuickBooks.
How Do I Fix a QuickBooks Error?
To fix a QuickBooks error, start by identifying the specific error code and its cause. Then, follow these general steps: update QuickBooks to the latest version, repair or reinstall the software, check for company file issues, adjust firewall and antivirus settings, and seek assistance from QuickBooks support or community forums for more complex errors.
What triggers Error H101 in the QuickBooks?
There are a handful of factors that trigger error H101 in QuickBooks, which are as follows:
- If QuickBooksDBXX or QBCFMonitor services are not running, this error can be triggered. These services start on their own, and the file doctor tool is used to resolve this issue.
- Another reason for this issue is inappropriate hosting configuration settings. This is very important if the server stores that QB files should have its hosting on.
- When you are trying to run the database service, the damaged QuickBooks database server manager can create such an error.
- If the firewall blocks access to the server, the user may face this error.
- If there is a damaged or incorrect file configuration, you may face the QuickBooks error H101 issue.
- If the QuickBooks firewall ports are not set up properly, this also restricts the passage of incoming and outgoing service of the QB files.
Why is My QuickBooks Multi-user Mode Not Working?
QuickBooks multi-user mode may not work due to various reasons, such as network issues, incorrect setup, firewall restrictions, or outdated software. To resolve this problem and enable smooth collaborative work, ensure proper network connectivity, configure settings for multi-user mode, adjust firewall settings, and update QuickBooks.
How Do I Fix QuickBooks Stuck in Single-user Mode?
To fix QuickBooks stuck in single-user mode, close the program, ensure no other users are logged in, and restart QuickBooks. If the issue persists, access the company file on the server, switch to multi-user mode, and verify user permissions.
Disclaimer: The information outlined above for “How to Fix QuickBooks Error H101 When Opening Company File?” is applicable to all supported versions, including QuickBooks Desktop Pro, Premier, Accountant, and Enterprise. It is designed to work with operating systems such as Windows 7, 10, and 11, as well as macOS.
