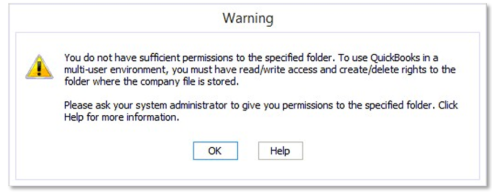
I’m Angela, and we’re trying to set up QuickBooks in a proper multi-user environment so multiple people on my team can access the company file from their own workstations. But when we try to switch to multi-user mode, QuickBooks throws an error saying the user doesn’t have sufficient permissions to set the site folder.
We’re running the file off a dedicated Windows Server 2019, and all systems have full admin privileges — or so we thought. I checked the folder hosting the .QBW file and even granted full control to the entire QuickBooks group on the server. Still nothing.
We also verified that hosting was turned on only at the server level, and turned off on the workstations. The Database Server Manager is installed and scanning the folder fine, but when a second user tries to open the file, the permission error hits again.
I even temporarily disabled UAC and antivirus just to test same problem. This is clearly a permissions thing, but we’ve covered the basics. Does QuickBooks require any special share settings at the SMB level? Or is this tied to how Windows handles mapped drives and UNC paths?
If anyone’s had to troubleshoot a similar site folder access issue in multi-user mode, I’d love to know what finally worked for you.
Hey Angela,
Hats off to you for putting so much effort into getting your QuickBooks Desktop Enterprise 2024 setup just right. It’s incredibly frustrating to run into a permission error— especially when you’re trying to get things running smoothly in a multi-user environment. The error stating that “the user doesn’t have sufficient permission to set the site folder” can be misleading and a bit tricky to resolve — but you’re absolutely not alone in facing it. This is a fairly common issue that many QuickBooks users encounter during multi-user configuration, particularly when working with a dedicated server setup.
From what you’ve described, you’ve already covered most of the critical areas:
- Running the company file from a dedicated Windows Server 2019.
- Granted full control to the QuickBooks group at the folder level.
- Confirmed hosting is active only on the server, and off on all workstations.
- Verifying the QuickBooks Database Server Manager is installed and scanning properly.
- You’ve even gone the extra mile by disabling UAC and antivirus for testing.
This shows you’ve got a deeper understanding of how QuickBooks multi-user mode should work. Still, If you’re still hitting a permission block when a second user tries to access the file, it usually means something deeper is going on—most likely with how the folder is shared on the network, the path being used, or even a firewall setting getting in the way.
From SMB-level sharing permissions to UNC path usage and firewall exceptions, we’ll help you to go through each possible step — until your team can seamlessly access the company file from their workstations.

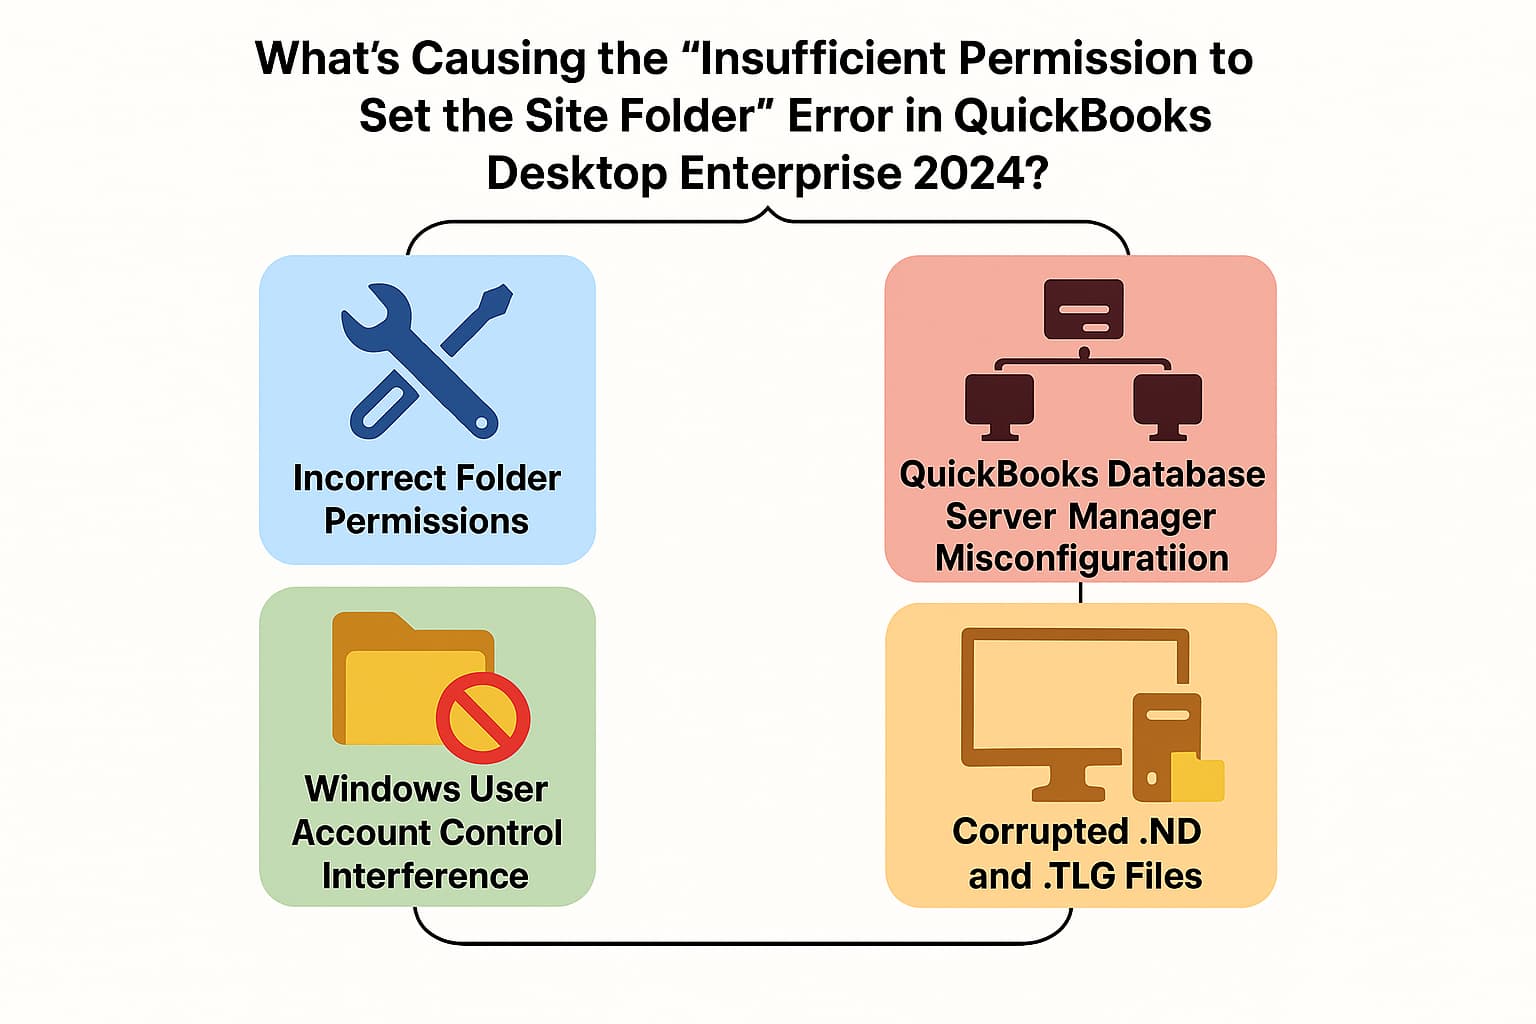
What’s Causing the “Insufficient Permission to Set the Site Folder” Error in QuickBooks Desktop Enterprise 2024?

The “Insufficient Permission to Set the Site Folder” error in QuickBooks Desktop Enterprise 2024 typically indicates an issue with how Windows permissions or network access is configured. Even if users have admin rights, QuickBooks may still struggle to create or access necessary folders due to one or more of the following reasons:
- The file is located in a restricted location.
- Folder permissions are not set up properly.
- The folder where the company file is saved is damaged.
- Hosting is enabled on workstations instead of the server.
- The file is stored in a protected location, such as the root of the C: drive or within the Program Files folder on Windows Vista, 7, or 8.
- Accessing the company file via a mapped drive rather than a UNC path.
- QuickBooks Database Server Manager not properly configured or running.
- Company file folder set to read-only mode.
- Missing or limited access for QBDataServiceUserXX Windows users.
- Windows User Account Control (UAC) interfering with folder access.
- Outdated or incorrect credentials saved in Windows Credential Manager.
- Trying to open the file using Public network profile settings.
- Corrupted Windows user profile or domain permission issues.
- Multiple versions of QuickBooks installed causing service conflict.
- .ND (Network Descriptor) and .TLG (Transaction Log) file is corrupted or incorrectly configured.
Step-by-Step Solutions to Fix QuickBooks Desktop Enterprise 2024 Multi-User Site Folder Access Error
Angela, running into a “site folder access” error while setting up multi-user mode in QuickBooks Desktop Enterprise 2024 can be frustrating—especially when you’ve already done so much to get everything in place. Whether it’s a permission setting, a network configuration, or a QuickBooks service that needs adjusting, these solutions are designed to walk you through each possibility—so you can get your team connected and working smoothly again.
Solution 1: Set QuickBooks to “Run as Administrator”
- Close QuickBooks Desktop.
- Hit right-click on the QuickBooks Desktop icon and choose Properties.
- Select Run this program as administrator under the Compatibility tab.
- Click Apply, and OK.
Solution 2: Move the Company File to the Default Location
- Shut down QuickBooks Desktop.
- Browse to the location of your company file.
- Right-click the company file (.qbw), and click Copy
- Navigate to the default location, right-click and select Paste.
- Location: C://Users/Public/PublicDocuments/Intuit/QuickBooks/Company Files
- Open the company file from the default location.
Solution 3: Fix Company File Issues and Network Issues
When you get an error while using, installing, or updating QuickBooks, download and install QuickBooks tool hub and run Quick Fix My Program to fix common errors right away.
Step 1: Download & Install the QuickBooks Tool Hub
The QuickBooks Tool Hub helps to fix common errors. You’ll need to close QuickBooks to use the tool hub. For the best experience, we recommend you use Tool Hub on Windows 10, 64-bit.
- Close QuickBooks.
- Download and install the most recent version (1.6. 0.8) of QuickBooks Tool Hub.
- Save the file somewhere you can easily find it such as your Downloads folder or your Windows desktop.
- Note: To find out which tool hub version you have, select the Home tab and the version will be on the bottom.
- Open the downloaded file QuickBooksToolHub.exe to start the installation.
- Follow the on-screen steps to install and agree to the terms and conditions.
- When the installation finishes, click twice on your Windows desktop icon to open the tool hub.

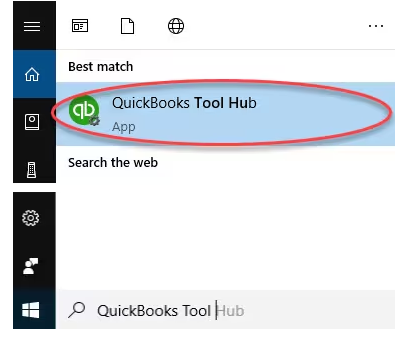
Note: If you are unable to find the icon, do a search in Windows for QuickBooks Tool Hub and select the program.

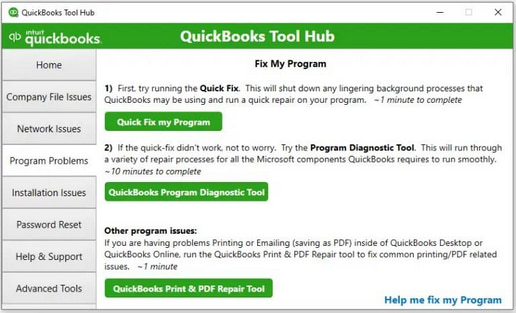
Step 2: Run Quick Fix My Program

The Quick Fix will shut down any open background processes QuickBooks uses. It’ll run a quick repair on your program.
- From the QuickBooks Tool Hub, choose Program Problems
- Select Quick Fix My Program.
- Start QuickBooks Desktop and open your data file.
Step 3: Run QuickBooks File Doctor
- Choose Company File Issues from the tool hub.
- Select Run QuickBooks File Doctor. It can take up to one minute for the file doctor to open.
- Note: If the QuickBooks File Doctor doesn’t open, look for QuickBooks Desktop File Doc and open it manually.
- In QuickBooks File Doctor, choose your company file from the dropdown menu. If you don’t see your file, click Browse and search to find your file.
- Select Check your file (middle option only) and click Continue.
- Enter your QuickBooks admin password and press Continue.
The scan can take up to 10–15 minutes depending on your file size. The scan may say it was unsuccessful even if it fixes your issue. When the scan finishes, open QuickBooks, and your company file.
Solution 4: Create a New Folder for the Company File(s)
- Create a new folder in the same directory.
- Copy your company files to the new folder.
- Note: Do not forget to set up folder permissions to share company files.
- Select Open or restore a company from the QuickBooks File menu.
- Choose Open a company file, and click Next
- Browse to the new folder and select a company file.
- Click Open.
Solution 5: Test and Set Folder Permissions
- Open Microsoft Word or notepad.
- Type “Test”.
- Save the file to the same location where the company file is stored.
- Your folder has the correct permissions if the file saves without any issue.
Solution 6: Set up Folder and Windows Access Permissions
The folders need to have the right Windows permissions to access folders in the multi-user mode. Every version of QuickBooks has corresponding components that need to be updated to function in the multi-user mode.
Verify that permissions are set correctly
- Navigate to the Windows Start menu and open File Explorer.
- Hit right-click on the folder that contains the company file. Then, choose Properties.
- Select Advanced on the Security tab.
- Choose QBDataServiceUserXX and click Edit.
- Set the following settings to Allowed:
- Traverse Folder/Execute File
- List Folder/Read Data
- Read Attributes
- Read Extended Attributes
- Create Files/Write Data
- Create Folders/Append Data
- Write Attributes
- Write Extended Attributes
- Read Permissions
If your permissions aren’t set correctly:
- Hit right -click on the folder that contains the company file and choose Properties.
- Select Security and click Edit.
- Choose QBDataServiceUserXX and select Full Control > Allow.
- Click Apply, and OK.
Change Folder Permissions
To adjust folder permissions:
- Go to the Windows Start menu and open File Explorer.
- Locate and right-click the folders listed below:
- C:\Program Data\Intuit\Entitlement Client\v8
- C:\Program Data\Intuit\Entitlement Client\v6.0
- C:\Program Data\Intuit\Entitlement Client\v5
- C:\Program Data\Intuit\Entitlement Client\v3
- C:\Program Data\Intuit\Entitlement Client
- C:\Program Data\Intuit\QuickBooks Enterprise Solutions X.0 (X = version) or C:\Program Data\Intuit\QuickBooks 20XX (XX = year)
- C:\Program Data\COMMON FILES\INTUIT
- C:\Program Data\COMMON FILES\INTUIT\QUICKBOOKS
- C:\Users\Public\Public Documents\Intuit\QuickBooks\FAMXX (XX = year)
- C:\Users\Public\Public Documents\Intuit\QuickBooks\Company Files
- C:\Users\Public\Public Documents\Intuit\QuickBooks\Sample Company Files\QuickBooks Enterprise Solutions X.0 (X = version) or C:\Users\Public\Public Documents\Intuit\QuickBooks\Sample Company Files\QuickBooks 20XX (XX = year)
Follow these steps for any of the folders. Don’t worry if you don’t see all of them—some folders only apply to certain versions of QuickBooks Desktop.
- Right-click on the folder and select Properties.
- Choose Everyone on the Security tab.
- Note: If Everyone is not listed in the Group or User Name checkbox, select Add and type in Everyone. Then, click OK.
- Select Full Control, and click Apply then OK.
Set Windows Access Permissions to Share Company Files
Make sure QuickBooks has the right level of access that can help prevent issues while working with your company files over the network.
Windows 10
- Move to the Windows Start menu and open File Explorer.
- Locate and right-click the folder containing your company files.
- Select Properties > Sharing > Share Add.
- Choose the corresponding QBDataServiceUserXX for your version.
- Set the permission level of both users to Full Control and click Share.
Windows Server 2012
Before moving further, ensure that File and Storage Services are installed.
- Go to the Windows Start menu.
- Enter “Run” into the search and open the Run Command.
- Type ServerManager and click OK.
- Choose File and Storage Services > Shares.
- Select New Share on the Task drop-down menu.
- You’ll see a list of File Share Profiles. To understand the differences between them, just click on each profile and read the description provided.
- Click SMB Share – Quick.
- Note: SMB Share – Quick is the default profile. This selection can vary.
- From the Share location section, choose Type a custom path and Browse to locate the folder you want to share.
- Select the appropriate folder and click Select a folder then Next.
- Note: You can leave the default selections under the Configure Share settings window and click Next again.
Solution 7: Use a UNC Path Instead of a Mapped Drive
- Hit a right-click on the QuickBooks Desktop icon.
- Press the Ctrl key on your keyboard, and click Run as Administrator. Hold down the Ctrl key until you have the No Company Open window.
- Note: Holding down the Ctrl key prevents QuickBooks Desktop from auto-opening a company file.
- Select Open or Restore Company from the File menu and click Open a company file then Next.
- In the left pane, choose Network, and navigate to the location of your company file.
- Note: You need to set folder permissions if you can’t find the folder where the company file is saved.
- Choose the company file and click Open.
Solution 8: Turn On Network Discovery
The disabled Network discovery mode will contribute to QuickBooks multi-user site folder access permission error. Here’s how you can turn it on.
- Type setting on the search box and click the Settings.
- Now, select Sharing Options.
- Choose and expand the Privatenetwork in further screen.
- Ensure these two options are selected – Turn on network discovery and Turn on Automatic Setup of network-connected devices.
- Click Save Changes.
Solution 9: Configure QuickBooks Database Server Manager
QuickBooks Database Server Manager allows you to share your company files with other computers over your network. When you set up a network, you need to run QuickBooks Database Server Manager so users can access your company files. It also helps you monitor your multi-user network.
- Open the Windows Start menu.
- Enter Services in the search box and open Services.
- Select and open QuickBooksDBXX (XX is the version number).
- Navigate to General and find Service status. If it’s Started or Running, click Stop.
- Choose Automatic from Startup type.
- Browse to the Log on tab and select Local System account.
- Choose Recovery and select Restart the Service from each of these: First failure, Second failure, and Subsequent failures.
- Return to General and click Start to restart Database Server Manager.
Solution 10: Rename .ND and .TLG files
.ND and .TLG are configuration files that allow QuickBooks Desktop to access the company file(s) in a network or in multi-user mode. Corrupted or damaged .ND or .TLG files can cause errors when opening QuickBooks Desktop. Renaming these files does not cause data loss since these are automatically recreated when you open the company file or scan the company files using QuickBooks Database Server Manager.
- Open the folder that holds your company file.
- Default Location: C:\Users\Public\Public Documents\Intuit\QuickBooks\Company Files
- Locate the files with the same file name as your company file but with extensions .ND and .TLG.
- Example: company_file.qbw.nd, company_file.qbw.tlg
- Right-click .nd/.tlg file and select Rename. Add the word “.old” after the file extension and click enter.
- Example: company_file.qbw.nd.OLD, company_file.qbw.tlg.OLD
Quick Tips to Avoid the “Insufficient Permissions to Access the Folder” Error in QuickBooks Desktop Enterprise 2024
By checking a few key areas—like folder permissions, network settings, and stored credentials—you can prevent Folder Permission errors in QuickBooks Desktop Enterprise 2024 before they disrupt your workflow.
- Always set folder permissions to properly share company files.
- Use UNC paths instead of mapped drives for consistent access.
- Ensure QuickBooks hosting is turned on only at the server.
- Regularly re-scan folders with QuickBooks Database Server Manager.
- Run QuickBooks with “Run as Administrator” enabled by default.
- Keep all systems on the same Private network profile.
- Allow QuickBooks ports and services through firewall and antivirus.
- Ensure the QBDataServiceUserXX account has full control over the file location.
- Avoid multiple QuickBooks versions on the same computer unless completely isolated.
- Re-map drives or re-share folders after major Windows or network changes.
- Use Windows Credential Manager to save the correct network login details.
- Perform periodic folder permission checks and backups.
Final Note!
Angela, you’ve done an exceptional job so far—your patience, persistence and the way you’ve carefully handled each step show how committed you are to setting your team up for success. Multi-user setups in QuickBooks can sometimes feel more complicated than they need to be, but the good news is: you’re truly just a few steps away from a stable, secure environment.
By walking through these solutions methodically—whether it’s adjusting folder permissions, checking your network settings, or configuring the Database Server Manager—you’re not only resolving this issue, but you’re building a stronger foundation for your entire workflow.
And if anything comes up along the way, please don’t worry —you’re not alone in this. We’re always here to support you, guide you, and help you move forward with confidence. You’re doing great—and we’ve got your back every step of the way.
Disclaimer: The information outlined above for “Can’t Fix “You do not have sufficient permissions to the specified folder” in QuickBooks Desktop Enterprise 2024” is applicable to all supported versions, including QuickBooks Desktop Pro, Premier, Accountant, and Enterprise. It is designed to work with operating systems such as Windows 7, 10, and 11, as well as macOS.
