Excerpt:
This article provides a clear guide on how to record chargebacks in QuickBooks, which are crucial for managing disputes, fraud, or errors in transactions. By accurately documenting chargebacks, businesses can maintain proper financial records, track customer disputes, and minimize future issues. The step-by-step instructions cover both QuickBooks Desktop and Online, ensuring that merchants can handle chargebacks efficiently and maintain transparency in their accounts.
 Add As A Preferred
In accounting a chargeback is a forced reversal transaction initiated by a customer’s bank, usually due to a dispute over fraud or errors. A chargeback occurs when the issuing bank transfers funds from a merchant’s account back to the customer’s account. This usually happens if the customer disputes a charge and the bank determines the dispute is valid.
Chargebacks in QuickBooks typically occur when a customer disputes a transaction, leading the bank or payment processor to reverse the payment. Here are the most common reasons:
Processing Errors – Issues like expired cards, incorrect account details, or technical failures during payment processing can cause disputes
QuickBooks records chargebacks in three types: merchant error, criminal fraud, and friendly fraud. These can arise from billing errors, unauthorized transactions, or customers disputing legitimate charges.
There are 3 types of chargebacks:
Chargebacks are incurred due to merchant errors, such as the trader charging the card holder twice or changing the card holder more than required, or charging a card holder for products not delivered as agreed. Chargebacks can also occur if a customer’s card is wrongly billed for a subscription or product they’ve already canceled.
Examples of merchant errors include:
Fraud chargebacks are touch transactions where a criminal uses the stolen bank card information to purchase items. Unauthorized transactions can occur when fraudsters or hackers misuse a card.
Examples of criminal fraud include:
Friendly fraud occurs when a cardholder disputes a legitimate charge with their bank instead of seeking a refund directly from the merchant. This practice is often used to obtain a refund through the bank without addressing the merchant first.
Examples of friendly fraud include:
To record a chargeback in QuickBooks, the process varies slightly depending on whether you are using QuickBooks Online or QuickBooks Desktop. Below are step-by-step instructions for both versions.
When a customer initiates a chargeback, the issuing bank notifies the acquiring bank, which debits the amount from the merchant’s account. The merchant receives an alert with a reason code and can either accept or dispute the chargeback. They have 7-10 days to provide evidence, and resolution takes 30-90 days.
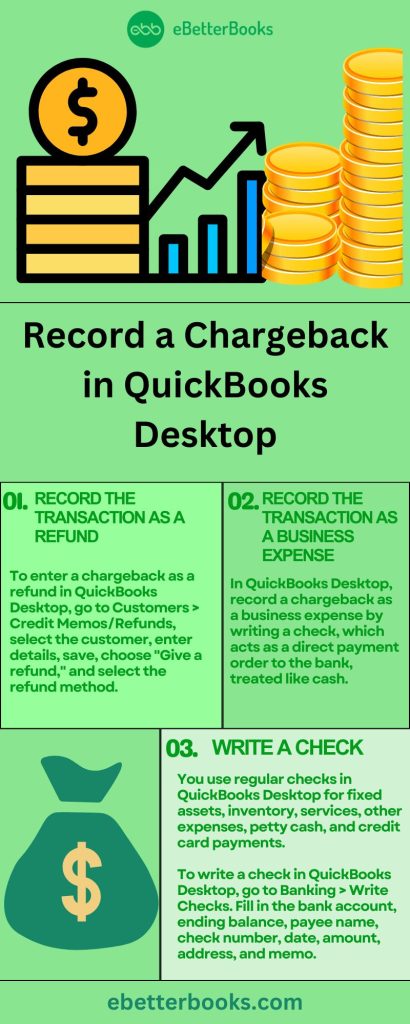
There are two ways to record a chargeback in QuickBooks Desktop and keep your books organized or up-to-date. Here’s how you can enter a chargeback through a refund or write a check:
By manually working through a chargeback entry, you can directly modify your accounts by debiting the expense account before crediting the related bank or credit card amount. It offers precise control over all the changes, which makes it ideal for institutionalized businesses that have to categorize chargebacks.
Follow these steps if you want to record a chargeback by issuing a refund to the customer:
Step 1. Access the Credit Memos/Refunds Window
Step 2. Select the Customer
Step 3. Enter Refund Details
Step 4. Save the Refund
Step 5. Choose Refund Option
Step 6. Issue the Refund
Another option is to record a chargeback in QuickBooks desktop as a business expense by writing a check. Checks are written orders to a bank to pay a certain amount to the person who is depositing it. They’re considered as good as cash. Mirroring the chargeback in records without any need for compilations and other alterations can help. Subtracting this aspect is a relevant method for enterprises that do not lay great emphasis on flexibility in recording.
Writing a check in QuickBooks allows you to track the chargeback and any associated fees properly.
Here’s how to do it:
Step 1. Navigate to the Banking Menu
Step 2. Select Write Checks
Step 3. Choose Your Bank Account
Step 4. Enter Payee and Amount
Enter the Payee (typically, this would be the merchant or financial institution processing the chargeback) and the Amount that was deducted from your account. Be sure to input the correct amount, as this reflects the chargeback amount.
Step 5. Add a Memo (Optional)
Step 6. Use the Expenses or Items Tab
Step 7. Save and Close
You generally use regular checks to pay for a fixed asset, inventory and non-inventory parts, service, other charges, and any expense you track in QuickBooks Desktop. You can also use this form to keep money into a petty cash account or pay credit card dues.
Write a Check for the Chargeback, do the following:
On the other hand, you can follow these steps to keep your invoice unpaid:
QuickBooks Desktop doesn’t track a refund and chargeback in a single transaction so you are recommended to record a chargeback manually. Therefore, you need to create separate entries to track the chargeback and the refund.
You can generate a check affecting Accounts Receivable and then establish an expense fee for the chargeback in QuickBooks Desktop. This process will result in a positive balance on the customer profile and take out money from the affected bank as well as record the fee for the chargeback.
Here’s how to create a write check manually:
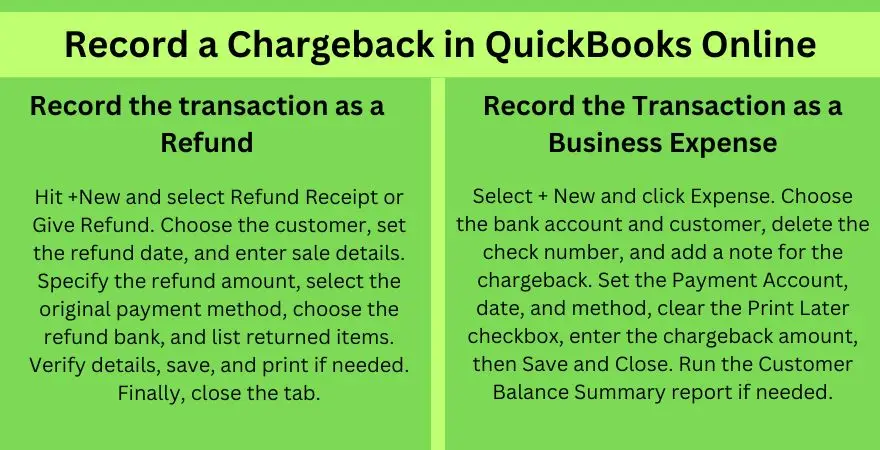
To enter a chargeback in QuickBooks Online, process it as a refund or a business expense. Enter the details, select the appropriate accounts, and save the transaction.
You can record a chargeback in QuickBooks Online using two methods;
Either way, a chargeback transaction will show up on your bank statement as a separate item. Here’s how you can enter a chargeback in QuickBooks Online:
This method is applied when a chargeback implies a cash refund to the buyer or the customer. It is usually seen where the chargeback was as an outcome of a disagreement between a consumer and a merchant or the consumer demanding a refund. When recording the chargeback as a refund, the business person accepts the reversal of income and captures the reduction in revenue correctly. Below are the steps:
Step 1: Add Refund Receipt
Step 2: Select the Refunding Customer
Step 3: Enter the Date
Step 4: Add Description
Step 5: Enter the Amount
Step 6: Select the Credit Card used
Step 7: Select the Bank
Step 8: Enter Details about the Product
Step 9: Recheck the Details
Step 10: Take a Print Out
Step 11: Finishing Up!
This is undertaken where there is a recorded chargeback in the expense without the customer directly refunding it. Used to monitor the different costs incurred by the business as one of the operating expenses or lost funds due to chargeback. This method helps make your accounts more accurate with the expense incurred in the chargeback that can be under the “Chargeback Expense” or “Bad Debt” account.
Below are the steps:
Step 1: Add the Expense
Step 2: Select the Bank and Customer Name
Step 3: Erase the Check Number
Step 4: Enter Details
Step 5: Clear the Checkboxes
Step 6: Select the Account
Step 7: Enter the Amount
Step 8: Finishing Up!
Once done, you can also run the Customer Balance Summary report to let you know what payments and invoices make up each customer’s current outstanding balance. For this, just navigate to the Reports menu and then search for Customer Balance Summary report.
Important Notes:
Chargebacks can happen for several different reasons. It can be a result of an error, fraud, or a dissatisfied customer. If you don’t handle them appropriately, they can cost you time and money. Here’s what to do if you get a chargeback for a payment you processed with QuickBooks Payments.
- Important: If you receive a chargeback, don’t issue a credit to the cardholder’s (your customer’s) card or any other type of refund, such as check or cash.
When customers dispute a charge with their bank or credit card company, the financial institution notifies QuickBooks Payments. QuickBooks analyzes the card for credits as soon as the chargeback is received.
There are cases when we’re unable to match the chargeback to the credit:
The customer’s card issuer credits the original charge amount to the cardholder if you didn’t provide a credit or if we can’t match the credit to the chargeback. The credited amount, plus a $25 fee, is then debited to you, the merchant. This fee isn’t a penalty. It’s used to cover related costs.
If you receive a chargeback, avoid issuing a refund directly to the customer.
Here’s how to handle it properly:
Step 1: Figure Out the Reason for the Chargeback
Step 2: What to Do When You Get a Chargeback
Step 3: Responding to the Chargeback
Step 4: Communicate with Your Customer
Step 5: Follow Up on Your Response
By following these steps, you can effectively manage a chargeback in QuickBooks Online and reduce potential fees.
Chargeback Protection, also known as Payments Dispute Protection, is a feature in QuickBooks designed to reduce the risks associated with disputed credit or debit card transactions, whether fraudulent or non-fraudulent. It’s available to eligible merchants using QuickBooks Payments.
Recommendation: It’s advised to maintain the coverage for 3–12 months after your last transaction if you plan to close your QuickBooks account.
Note: There’s a coverage limit of $10,000 per chargeback and an annual limit of $25,000 per year. Your coverage limit resets to $25,000 every year, on the anniversary of your signup date.
Below are the recommendations for recording a chargeback in QuickBooks:
Document Every Activity in Detail:
It is a good practice to keep a full record of all transactions made, any form of communication with the customer, and any backup documentation in support of chargebacks when required.
Use the Appropriate Accounts:
Reclassify chargebacks in the right expense codes(for example, in the Bad Debt or Chargeback expense codes) for better tracking.
Record Chargebacks Promptly:
Record all the chargebacks as soon as they are discovered because the records should always remain updated as the accounts in question.
Check Bank Statements Often:
This means that individuals must check bank statements and credit card statements more often to spot chargebacks and ensure that they appear properly in QuickBooks.
Reconcile Transactions:
To avoid overlooking chargebacks, reconcile bank statements and credit card statements to QuickBooks on a routine basis.
Create Detailed Memos:
Each chargeback entry should have additional comments that include information such as the cause of the chargeback and the customer involved.
Using Journal Entries in Complex Cases:
If the chargeback is more complex, journal entries are even more crucial because the chargeback will have to be entered into the accounts.
Set Up Notifications and Alerts:
Set up bank feeds and notifications in QuickBooks that can notify you whenever new chargebacks occur, thereby increasing the speed of charging.
When a chargeback occurs, it appears in your bank feed as a withdrawal. To maintain accurate records, you must match this transaction correctly in QuickBooks Desktop. Follow these steps to ensure seamless reconciliation:
Step 1: Open the Bank Feeds Center
Step 2: Locate the Chargeback Transaction
Step 3: Match the Chargeback to an Existing Entry or Create a New One
Step 4: Confirm and Reconcile
Tracking chargebacks in QuickBooks is essential for maintaining accurate financial records and understanding transaction disputes. Whether you’re using QuickBooks Online or Desktop, you can monitor chargebacks using reports that categorize these transactions properly.
A chargeback occurs when a customer disputes a transaction, leading to a reversal of funds. This can result from errors, fraudulent activity, or dissatisfaction with a product or service. In QuickBooks Desktop and Online, you can record a chargeback by following these steps:
By accurately recording chargebacks in QuickBooks, businesses can keep their financial records accurate and maintain clear documentation of disputed transactions.
Chargebacks can disrupt your cash flow and lead to unexpected losses. QuickBooks Online offers Chargeback Protection to help businesses minimize the risks associated with disputed transactions. Here’s how you can enable it:
Steps to Enable Chargeback Protection in QuickBooks Online:
Key Benefits of Chargeback Protection:
Seamless integration with QuickBooks Payments for real-time monitoring.
Recording chargebacks correctly in QuickBooks is essential for maintaining accurate financial records and managing disputes effectively. Whether you use QuickBooks Desktop or Online, following precise steps ensures your accounts stay balanced and transparent. This guide highlights common challenges and practical solutions for smooth chargeback management.
While recording chargebacks, avoid these five common mistakes. First, entering duplicate records, which accounts for 30% of accounting errors. Second, selecting the wrong expense category, leading to 25% of financial reports being inaccurate. Third, entering incorrect chargeback amounts, causing 20% of reconciliation issues. Fourth, confusing refunds with chargebacks, resulting in 15% of transactions being misclassified. And fifth, failing to record them on time, which causes 40% of delayed dispute resolutions. By steering clear of these mistakes, you can maintain your QuickBooks records with up to 99% accuracy and stay well-prepared for audits.
Chargebacks affect financial statements significantly. They reduce your revenue by 100% of the disputed amount, impacting profit margins by up to 5%. If unrecorded, chargebacks cause 20% discrepancies in cash flow reports. They increase expense accounts by 2-3%, mainly in chargeback fees, which average $25 per case. Ignoring chargebacks can delay financial closing by 3-5 days due to reconciliation errors. Proper recording ensures that your balance sheet accurately reflects liabilities and prevents overstatement of income by 10-15%. Timely management helps maintain compliance and reduces audit risks by up to 30%.
If chargebacks don’t show correctly in QuickBooks, follow these 4 key troubleshooting steps. First, verify bank feed synchronization; 35% errors occur due to delayed updates. Second, check account mapping accuracy—incorrect mapping causes 40% mismatches. Third, review transaction dates carefully; 20% errors arise from date discrepancies. Fourth, reconcile your accounts monthly to catch 90% of data inconsistencies early. Always back up data before adjustments to prevent 100% data loss risk. Applying these steps reduces errors by 70% and saves up to 5 hours monthly in manual corrections.
Chargeback fees typically range from $15 to $25 per incident, adding 3–5% to your overall expenses. Properly recording these fees in QuickBooks reduces financial discrepancies by 80%. Use a dedicated “Chargeback Fees” expense account to separate fees from product costs. Regularly review your bank statements to identify hidden fees; 25% of merchants overlook these charges. Allocating fees correctly helps maintain accurate profit margins and improves financial forecasting by up to 10%. Ignoring fees can cause a 15% understatement of expenses, affecting tax reporting and cash flow management.
QuickBooks Desktop requires manual entry for chargebacks, increasing the chance of 20% human error, while QuickBooks Online offers automated bank feed matching, reducing errors by 35%. Desktop users must navigate multiple windows, which can extend recording time by 25%, whereas Online users benefit from streamlined refund and expense forms. QuickBooks Online supports real-time notifications for chargebacks, cutting response time by 40%. However, Desktop offers more customization in categorizing chargebacks, useful for complex businesses. Choosing between them depends on your business size: Desktop suits firms with detailed accounting needs; Online is ideal for fast, cloud-based tracking.
Managing chargebacks efficiently is critical for maintaining accurate financial records and protecting your business revenue. This guide explains how to record chargebacks in QuickBooks Desktop and Online, handle disputes, and minimize losses. Follow these practical steps to ensure your accounts stay balanced and transparent while reducing chargeback-related risks.
Maintaining audit trails for chargebacks is vital to ensure compliance and simplify dispute resolution. Always document 100% of chargeback-related communications, including emails and receipts. Use QuickBooks’ memo fields to log detailed notes; this reduces investigation time by 40%. Back up your data weekly to prevent 90% of data loss risks. Implement a standardized naming system for chargeback transactions to improve searchability by 50%. Finally, review audit trails monthly to catch inconsistencies early, decreasing accounting errors by 30%. These practices safeguard your business and streamline chargeback management effectively.
Monitoring chargeback trends in QuickBooks helps identify recurring issues and reduce financial losses by up to 20%. Use the Transaction Detail by Account report to track chargeback frequency monthly. Customize Profit and Loss reports to isolate chargeback expenses, revealing their impact on profit margins—often a 3-5% reduction. Set report alerts to notify you when chargebacks exceed a 10% threshold of total sales. Analyze customer-specific reports quarterly to pinpoint high-risk accounts. Regular review of these reports can improve dispute response time by 35% and help implement preventive measures, safeguarding your business finances.
Integrating third-party payment processors like Stripe or PayPal with QuickBooks can streamline chargeback management by syncing 90% of transaction data automatically. This reduces manual entry errors by up to 40% and accelerates reconciliation by 30%. Many processors provide real-time alerts for disputes, enabling faster response within the 7-10 day deadline. Automated syncing also helps categorize chargebacks under specific accounts, improving reporting accuracy by 25%. However, ensure your integration supports refund and chargeback differentiation to avoid 15% misclassifications. Proper integration cuts administrative workload by 20%, freeing up time for strategic dispute resolution.
Training your accounting team on chargebacks can reduce errors by 50% and speed up dispute resolution by 30%. Start with clear, step-by-step manuals covering QuickBooks Desktop and Online chargeback processes. Use real transaction examples to illustrate common mistakes and corrections, improving retention by 40%. Schedule quarterly refresher sessions to update the team on policy changes and new features, boosting compliance by 25%. Encourage open communication for quick problem-solving. Leveraging role-based access in QuickBooks also limits errors by restricting sensitive entries. Well-trained teams contribute to accurate financial reporting and minimize chargeback-related losses effectively.
Automating chargeback notifications in QuickBooks reduces missed disputes by 70% and improves response time by 40%. Set up bank feeds and link them to your QuickBooks Online or Desktop account for real-time transaction updates. Use built-in alert systems or third-party tools to trigger email or SMS notifications immediately when a chargeback posts. Automation helps track multiple chargebacks simultaneously, cutting manual oversight by 60%. Regularly review alert settings to ensure accuracy and prevent false positives, which account for 15% of notifications. Automated alerts ensure timely action, helping protect cash flow and reduce potential losses from unresolved chargebacks.
Thus, recording a chargeback is crucial for maintaining the integrity of your financial records or statements. Chargebacks can have a significant impact on the reconciliation of accounts as they create discrepancies in your financial data and may result in refunds, disputes or unauthorized transactions. If chargebacks are entered accurately in QuickBooks, it enables businesses to analyze patterns, identify areas for improvement, and make informed-decisions to minimize future chargebacks.
Still have questions? Explore our detailed FAQs.


