An administrator account grants you the ability to alter security configurations, install hardware and software, access all files, and modify other user accounts.
Modifying Administrator Account in Windows 10
You can modify the administrator account on Windows 10 through Windows Settings. But to do so, you need administrator privileges. If you have a standard account, you’ll need to request an administrator to grant you access.
The administrator can do this by:
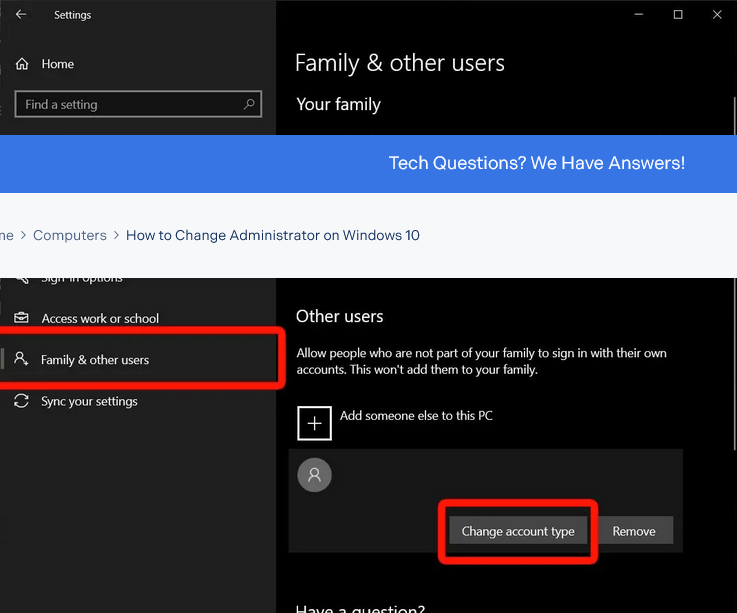
- Step 1: Navigate to Settings > Account
- Step 2: Select Family & other users
- Step 3: Then select the User account
- Step 4: Click on Change account
- Step 5: Select the Administrator radio button
- Step 6: Press OK to complete the process
Complete the following process to change the administrator account in Windows 10:
- Step 1: Press the Windows Start button.
- Step 2: Choose Settings. (An icon shaped like a gear located just above the power icon.)
- Step 3: Choose Accounts.
- Step 4: Select Family & other users. (You’ll find this option in the left sidebar.)
- Step 5: Select a user account under the Other users panel.
- Step 6: Then choose Change account type.

- Step 7: Select Administrator in the Change account type dropdown.
Modifying Administrator Account in Windows 11 via Control Panel
While Windows 11 has centralized the majority of configurations and options in the Settings app. Modifications to the administrator account can be done with the Control Panel.
The following is the method to change the administrator account on Windows 11 using the Control Panel:
- Step 1: Launch Control Panel. (Press the magnifying glass icon on the taskbar, type “control panel”, and open Control Panel.)
- Step 2: Select Change account type which is directly under the User Accounts heading. If you don’t see that option, modify the View by option to Category.
- Step 3: Choose the user account that needs to be granted administrative control.
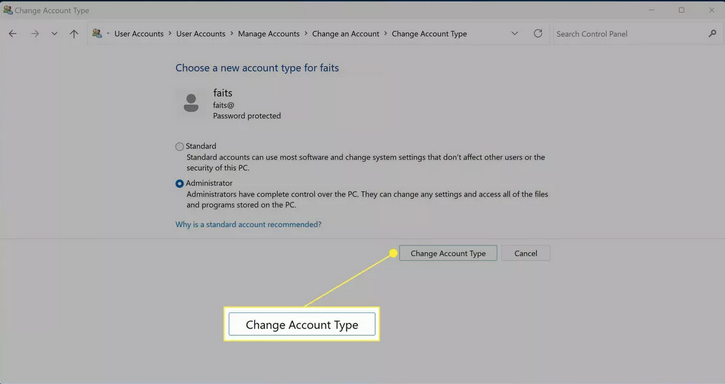
- Step 4: Select Change the account type.
- Step 5: Select Administrator.
- Step 6: Press Change Account Type to complete the process.
