

Highlights (Key Facts & Solutions)
- Undeposited Funds Workflow is Mandatory: Customer payments must be initially recorded into the Undeposited Funds account (an Other Current Asset account). This holds the gross payments until the business is ready to create a single deposit that reflects the lump sum received in the bank.
- Fee Entry Method: The credit card processing fee is recorded as a negative line item directly within the Bank Deposit (QBO) or Make Deposits (QBD) form. The negative value is essential to subtract the expense from the total deposit amount.
- Expense Classification: Fees must be categorized as an Operating Expense in the Chart of Accounts (e.g., “Credit Card Processing Fees”). This ensures they appear correctly on the Profit and Loss statement, separate from Cost of Goods Sold or other expenses.
- Charging Customers: To pass the fee to the customer, a custom Service Item must be created and linked to a separate Income account (e.g., “Surcharge Income”). This item is added to the customer’s invoice.
- Journal Entries Discouraged: Using a Journal Entry to record the fee is strongly discouraged for standard transactions, as it bypasses the correct Undeposited Funds workflow and complicates the bank reconciliation process.
- Third-Party Payments: If the bank feed shows a gross deposit and a separate fee withdrawal, the user should match the deposit to the payment and categorize the withdrawal directly to the Expense account, bypassing the manual deposit workflow to avoid double-recording the fee.
Overview
Credit card fees are unavoidable when handling payments, but effectively recording them in QuickBooks is critical for accounting purposes.
Accurately recording these fees in QuickBooks makes it easier to monitor your financial situation and ensures that your revenue and expenses are appropriately represented.
Knowing how to enter these fees into QuickBooks will speed up your accounting procedures, lower error rates, and save time on reconciliations whether you’re an accountant or a small business owner.
This article will show you how to record these fees while using QuickBooks online and on the desktop to track your business’s income and expenses accurately.
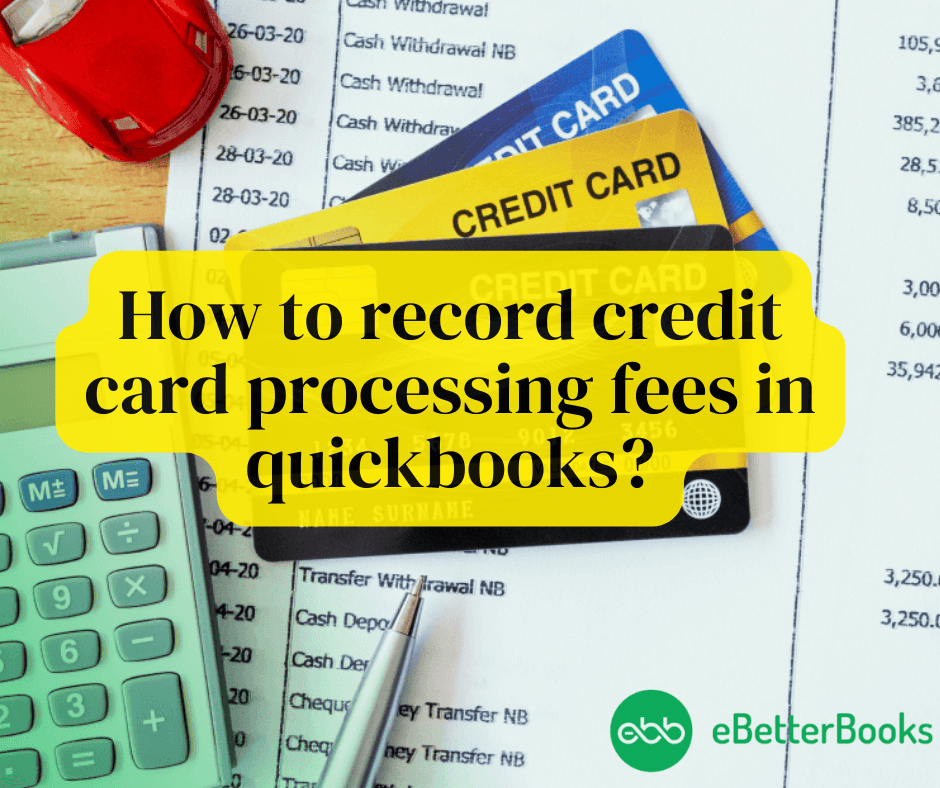
How to record credit card processing fees in QuickBooks Online?
Recording credit card transactions in QuickBooks is critical to a book of accounts since it keeps an organization’s records accurate. If you’re using QuickBooks Desktop or QuickBooks Online, these transactions are useful for making sure your accounts are current.
Indeed, the classification of debit card transactions is one of the most important factors in the process, especially if the payment is made immediately.
These transactions are usually recorded under the right expense account depending on their nature (e.g., office supplies, utilities, and many others).
In this step-by-step guide, you will learn how to enter debit card transactions in QuickBooks, whether they are immediate or delayed.
In order to account for Credit Card Processing Fees in QuickBooks, you need to follow the steps:
Step 1. Create an Invoice
- Click on the “+ NEW” button at the top left corner of the screen.

- Select “Invoice.”
- Enter the details such as the customer’s information, products or services, and agreed-upon payment terms.

- Click “Save and Send” once completed.
Step 2. Record Customer Payments (if submitted outside QuickBooks Online):
- Navigate to the “Invoices” tab and locate the invoice for which you want to record a payment.
- Select the invoice and click on “Receive Payment.”
- In the “Deposit To” dropdown, choose the relevant account. If the payment is in transit, use the “Undeposited Funds” account.

Step 3. Record Bank Deposit:
- Once the payment has been deposited, create a new bank deposit:
- Click “+ NEW” and choose “Bank Deposit.”
- Select the payment included in the deposit.

- Under the “Adds to this deposit” section, input the credit card processing fee details, including account information, description, and the amount charged.
How to add the credit card processing fee to your invoices?
Including credit card fees on QuickBooks invoices ensures accurate financial reporting and transparent communication with clients regarding additional charges.

Methods to Add Credit Card Processing Fees:
- Manually:
- Go to the “Get Paid & Pay” tab on the left navigation bar.
- Select “Products and Services.”
- Click “New” and choose “Service.”
- Enter the name of the service item.
- Assign the appropriate account to track processing fees.
- Click “Save and Close.”
- Using a Third-Party App:

- Log into your QuickBooks Online account.
- Click on the “Apps” tab and search for an app that will integrate with your QuickBooks Online account.
Charging a Credit Card Processing Fee to a Customer Invoice:
Setting up credit card processing fees in QuickBooks requires careful navigation, which is crucial for business owners.
Here are the steps on how to charge the credit card processing fees to the customer:
First, create a service item and then manually add it as a line item to their invoice.

- Click on “Sales” and then “Products and Services.”
- Click “New” and select “Service.”
- Enter the name of the service item.
- Choose the account to track the processing fees under the “Income Account” dropdown.
- Save the changes.
- When creating or editing an invoice:
- Add the fee item you created from the “Product/Service” dropdown.
- Optionally, include a note about the fee in the “Message on Invoice” section.
- Save and close the invoice.
When creating an invoice or using the existing ones, you can add it by the below mentioned steps:
- Create a new or open the customer’s invoice.
- Select the fee item you have created on the Product / Service dropdown.
- You can add a note about the fee, under the Message on invoice section.
- Click on Save and Close or Save or Send.
How to record credit card processing fees in QuickBooks Desktop?

Recording credit card processing fees in QuickBooks Desktop involves tracking transactions manually to ensure accurate categorization.
In order to record the card processing fee manually in QuickBooks Desktop ( QuickBooks Self-employed), kindly follow the steps:
1. Record the Payment Received
- Open QuickBooks Desktop.
- Go to Customers > Receive Payments.
- Select the customer who made the payment.
- Enter the payment details (amount received, payment method, etc.).
- Ensure the Undeposited Funds account is selected if you plan to group multiple payments.
2. Record the Deposit and Processing Fee
- Go to Banking > Make Deposits.
- In the Payments to Deposit window, select the payment(s) you just recorded and click OK.
- In the Make Deposits window, do the following:
- Enter the full payment amount in the first line.
- On the second line, add a new entry for the credit card processing fee:
- In the Received From column, select a vendor or leave it blank.
- In the From Account column, choose an expense account (e.g., “Bank Fees” or “Credit Card Fees”).
- Enter the fee amount as a negative value (e.g., -5.00).
3. Save the Transaction
- Verify that the Net Deposit Amount matches the actual amount deposited in your bank account.
- Click Save & Close or Save & New to complete the process.
Critical Aspects of Recording Credit Card Processing Fees in QuickBooks
Understanding how to record credit card processing fees is just the beginning — mastering it requires clarity on accuracy, reporting, and reconciliation. In this section, we’ll uncover five key areas often overlooked by users but essential for maintaining clean books, maximizing deductions, and avoiding compliance risks. Each subtopic delivers practical insights, sharp distinctions, and direct actions that help you tighten your accounting process in both QuickBooks Online and Desktop.
Why It’s Important to Categorize Processing Fees Under the Right Expense Account
Credit card fees must be recorded under the correct expense account to ensure tax-ready reports, real-time cash flow clarity, and accurate profit margins. If miscategorized, your statements may inflate operational costs, skew net income, and create audit risks. For example, assigning fees to “Miscellaneous” instead of “Bank Fees” affects tax deductions, error tracing, and forecasting accuracy. In QuickBooks, consistent categorization boosts automation, simplifies month-end closing, and improves accountant collaboration. Business owners often overlook this step, causing 3 major problems: mismatched deposits, IRS red flags, and distorted financial insights. Avoid these issues by setting rules, verifying accounts monthly, and training staff.
Common Mistakes While Recording Processing Fees in QuickBooks
Most users make 3 critical mistakes: skipping fee entry, using incorrect accounts, and ignoring reconciliation. If you record gross income without subtracting the processing fee, your revenue inflates and misleads decision-making. Using an unrelated expense account like “Office Supplies” for fees disrupts expense classification, leading to poor tax deductions and reporting errors. Failing to reconcile deposits with statements causes mismatched balances, audit complications, and inaccurate cash flow views. In QuickBooks, these mistakes multiply over months, affecting budgeting, vendor trust, and financial planning. Avoid this by setting a standard workflow, reviewing fee entries weekly, and cross-verifying with your bank feed.
How Credit Card Fee Recording Affects Financial Reports and Tax Filings
Incorrect fee recording affects 3 major areas: profit reports, tax deductions, and liability tracking. If fees aren’t properly logged, your profit & loss statement will overstate income, misrepresent costs, and skew KPIs. During tax season, misfiled fees reduce deductible expenses, inflate taxable income, and increase audit exposure. Inaccurate recording also breaks links between income and bank deposits, confusing both accountants and the IRS. QuickBooks depends on clean entries for generating accurate reports, auto-calculations, and compliance-ready data. Fix this by tagging fees to the right account, reviewing reports monthly, and syncing data with your accountant for quarterly checks.
Differences Between Manual and Automated Fee Tracking in QuickBooks
Manual tracking requires 3 repetitive actions: entering fee amounts, selecting accounts, and reconciling deposits — each prone to errors, delays, and data mismatches. In contrast, automation uses bank rules, app integrations, and recurring entries to save time, reduce human error, and ensure consistency. Manual methods often lead to skipped fees, wrong classifications, and inconsistent reporting. Automated tools in QuickBooks improve accuracy, speed, and audit readiness by tagging fees during imports, flagging discrepancies, and auto-categorizing transactions. For busy users, automation reduces workload, enhances visibility, and supports faster month-end closures. Choose based on volume, complexity, and internal skill level.
Best Practices for Reconciling Credit Card Fees with Bank Statements
Effective reconciliation requires 3 key habits: matching deposits, verifying fee deductions, and reviewing statement dates. Many businesses overlook small fee variances, leading to inaccurate balances, false profit readings, and failed audits. In QuickBooks, use the Reconcile tool monthly to cross-check fee entries, detect missed charges, and validate net deposits. Always compare your merchant statements with QuickBooks deposits to catch hidden deductions, double entries, or processing delays. Clean reconciliation improves trust in reports, supports cash planning, and flags fraudulent activity early. Make it a routine by setting calendar reminders, assigning ownership, and saving reconciliation reports for audit trails.
Enhancing Your Understanding of Credit Card Processing Fees in QuickBooks
Managing credit card processing fees isn’t just about entry—it requires strategic knowledge of fee types, negotiation tactics, legal rules, and technology tools. This section offers five focused insights that help small businesses control costs, stay compliant, and boost profitability. Each topic delivers actionable advice designed to complement your QuickBooks workflow and empower smarter financial decisions in today’s dynamic payment landscape.
Understanding the Types of Credit Card Processing Fees Businesses Encounter
Businesses typically face 3 main types of credit card processing fees: flat-rate fees, interchange fees, and assessment fees. Flat-rate fees (e.g., 2.9% + ₹3) are charged per transaction, making small sales less profitable. Interchange fees vary by card type and are set by banks, impacting margins without warning. Assessment fees are charged by card networks like Visa or Mastercard and can affect high-volume merchants significantly. Without knowing these distinctions, users often misclassify charges, underestimate total costs, and misalign pricing strategies. Always review your processor’s fee structure, audit monthly statements, and map each fee type correctly in QuickBooks.
How to Negotiate Lower Credit Card Processing Rates with Providers
Lowering processing rates starts with 3 focused actions: analyzing your fee statement, comparing providers, and initiating rate discussions. Most businesses overpay due to outdated contracts, unclear fee tiers, and lack of volume-based discounts. By reviewing statements line-by-line, you can spot hidden charges, redundant services, and inflated surcharges. Competitive quotes from other providers give you leverage for negotiation, especially if your monthly volume crosses ₹1–2 lakhs. When you negotiate, ask for lower interchange markups, waived monthly minimums, and fixed per-transaction fees. Regular renegotiation, at least once a year, ensures better margins, lower overheads, and scalable payment solutions.
Overview of Third-Party Apps That Simplify Fee Tracking in QuickBooks
Third-party apps help automate credit card fee tracking with 3 main benefits: syncing transactions, categorizing fees automatically, and generating detailed reports. Apps like Expensify, Bill.com, and Payment Rails connect directly to QuickBooks, reducing manual entry and errors. They streamline reconciliation by matching fees against deposits, flagging discrepancies, and updating your books in real-time. Using these apps saves up to 5 hours monthly for accounting teams and improves accuracy by over 90%. Selecting the right app depends on your business size, transaction volume, and integration needs. Regularly reviewing app performance ensures your accounting remains seamless and audit-ready.
Legal Considerations When Passing Processing Fees to Customers
Passing credit card fees to customers involves 3 critical legal considerations: transparency, compliance, and state regulations. Many regions mandate clear disclosure of any surcharges or convenience fees during checkout. Non-compliance can lead to fines, chargebacks, and reputational damage. Laws vary widely; for example, some US states prohibit surcharging, while others allow it with proper notice. Businesses should always review local laws, update invoice terms, and inform customers upfront. Maintaining clear records of these fees in QuickBooks supports legal audits and customer trust. Consulting a legal advisor annually helps stay compliant and avoid costly penalties.
How Credit Card Fee Trends Impact Small Business Profitability
Increasing operational costs, influencing pricing strategies, and impacting cash flow. Rising fees can reduce net profit margins by up to 2-3%, forcing businesses to rethink product prices or absorb costs. Seasonal spikes in processing fees may strain cash flow, delaying supplier payments or payroll. Awareness of fee trends helps businesses forecast expenses accurately and negotiate better rates. Tracking these trends in QuickBooks enables proactive financial planning, ensuring sustainability. Staying updated on fee changes supports smarter decisions and protects profitability in competitive markets.
Conclusion
To guarantee appropriate representation and tracking of credit card fees within the financial records, entering them into Quickbooks calls for an ordered process. Acquiring proficiency in entering credit card processing fees into QuickBooks facilitates day-to-day financial management along with well-informed decision-making and strategic planning.
Credit card statements and recorded fees should be regularly reconciled to help find inconsistencies and preserve financial correctness. This allows firms to make well-informed financial decisions based on accurate information.
FAQ
Why must I use the Undeposited Funds account when recording customer payments before the bank deposit?
Using the Undeposited Funds account is a crucial workflow that acts as a temporary holding area for payments received but not yet deposited into your bank account. This practice is essential for accurate bank reconciliation.
- Matching Principle: It allows you to group multiple individual payments (like several credit card transactions or checks) into a single Bank Deposit transaction in QuickBooks. This single entry matches the lump-sum deposit amount that appears on your actual bank statement, preventing discrepancies.
- Asset Account: Undeposited Funds is an asset account that acts as a bridge between the moment you receive payment and the moment the bank officially clears the funds.
- Workflow Risk: Failing to use this account and instead depositing payments directly can lead to duplicate income entries or transactions stuck in Undeposited Funds, which requires cleanup.
How do I correctly categorize the credit card processing fee in my Chart of Accounts?
For accurate financial reporting compliant with accounting standards, the processing fee should be categorized as an operating expense.
- Account Type: Create a specific Expense account in your Chart of Accounts.
- Recommended Names: Use clear names such as “Credit Card Processing Fees,” “Merchant Fees,” or “Bank Service Charges.”
- P&L Placement: This expense is classified under Operating Expenses on your Profit and Loss (P&L) statement. This ensures the costs of generating revenue (the fee) are properly reflected, giving a true picture of your operating costs.
- Note: Current QuickBooks payment rates vary significantly based on the transaction type, such as 2.99% for invoiced transactions or 2.5% for swiped transactions (rates are subject to change by Intuit).
What is the key difference between recording the fee in QuickBooks Online versus QuickBooks Desktop?
The core mechanism for recording the net deposit is identical (using a negative line item), but the execution takes place in slightly different interfaces.
| Feature | QuickBooks Online (QBO) | QuickBooks Desktop (QBD) |
| Transaction Form | Bank Deposit (accessed via + New menu) | Make Deposits (accessed via Banking menu) |
| Fee Entry Location | Under the “Add funds to this deposit” section. | As a negative line item on the deposit window. |
| User Access | Cloud-based, accessible from any device. | Installed software, typically limited to a single computer unless hosted. |
Both methods achieve the same goal: combining the gross payment and the negative fee into a single net deposit amount that matches the bank statement.
When charging the processing fee to a customer, should I use an Income or Expense account for the service item?
When you charge a fee to a customer (often called a convenience or surcharge fee), the service item you create for the invoice must be mapped to an Income account.
- Service Item Setup: Create a new service item in the Products and Services list and link it to a specific Income account, such as “Surcharge Income.”
- Accounting Effect: The customer’s payment (which includes this surcharge) increases your income. The original fee you pay to the processor is still recorded as an Expense.
- Goal: The aim is to ensure the surcharge collected from the customer offsets the expense paid to the processor, resulting in a minimal net P&L impact for that transaction.
I missed recording the fee last month. What is the easiest way to fix this during reconciliation?
The most correct & compliant way to fix a missed fee is to record it directly in the reconciliation process as an expense dated for the current period, or by creating a missing Bank Deposit.
- QBO Method (Recommended): If the payment has already been matched and cleared without the fee, use the + New button to create a new Bank Deposit for the missing fee amount. You would enter the fee as a single negative line item, and this transaction will then appear in the reconciliation screen to be checked off against the difference.
- Quick Fix: Alternatively, in the reconciliation window, you can sometimes select the option to add a missing transaction or make a bank adjustment, ensuring the transaction is coded to your Credit Card Processing Fees expense account and dated correctly. However, a proper Bank Deposit is cleaner.
- Warning: Avoid simply accepting a reconciliation difference, as this forces QuickBooks to create an auto-adjustment Journal Entry, which is generally discouraged without an accountant’s review.
Can I use a journal entry instead of a deposit transaction to record the fee?
While a Journal Entry (JE) can manipulate account balances, it is not the recommended best practice for recording transaction fees and is advised against by most certified bookkeepers.
- Workflow Disruption: Using a JE bypasses the crucial Undeposited Funds workflow. It makes the transaction much harder to match and reconcile with the single lump-sum deposit amount that appears on your bank statement.
- Accountant Use: Journal entries are best reserved for internal, non-bank-related adjustments, such as recording depreciation or transferring funds between equity accounts.
- The Correct Way: Always use the Make Deposits/Bank Deposit feature, as this is the intended and most reliable tool for netting out payments and fees before they hit the bank register.
Why am I sometimes seeing two fees for one transaction in my bank feed?
Seeing two distinct fee transactions can occur due to the specific way some third-party payment processors handle deposits, requiring a different approach in your bank feed.
- Gross Deposit Method: The processor deposits the full (gross) amount of the sale, and then separately withdraws the fee amount in a second transaction.
- Your Action: If your bank feed shows two lines—a gross deposit and a separate fee withdrawal (Expense)—you should not use the Bank Deposit method. Instead, you should:
- Match the gross deposit to the customer payment in your books.
- Categorize the separate withdrawal/expense transaction directly to your Credit Card Processing Fees expense account.
- Avoid Duplication: If you use the Bank Deposit method in this scenario, you will incorrectly record the fee twice: once in the deposit transaction and once when you categorize the withdrawal from the bank feed.
Disclaimer: The information outlined above for “How to Record Credit Card Processing Fees in QuickBooks Online and Desktop?” is applicable to all supported versions, including QuickBooks Desktop Pro, Premier, Accountant, and Enterprise. It is designed to work with operating systems such as Windows 7, 10, and 11, as well as macOS.