Excerpt:
Recoding a bounced check in QuickBooks (both Desktop and Online) involves documenting key details, like check number, bounce date, amount, bank fees, and customer information. Methods like the "Bounce Record Feature" or journal entries help track outstanding payments and ensure your accounts remain up-to-date.
 Add As A Preferred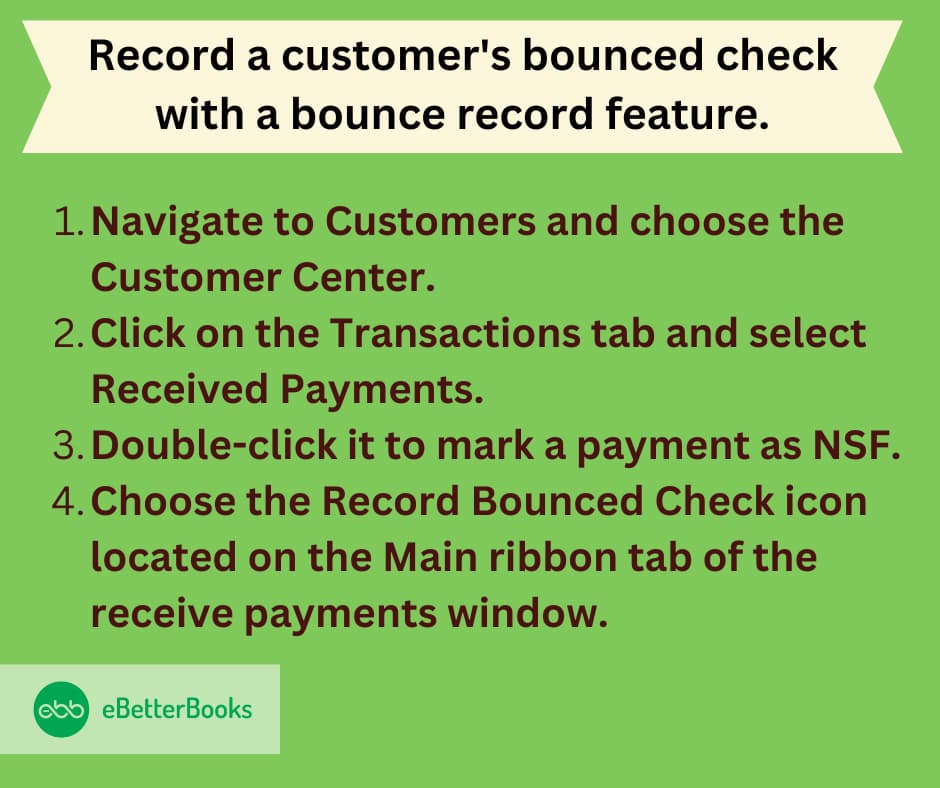
Recording a bounced check requires precise financial expertise, and this guide provides authoritative, step-by-step procedures to manage Non-Sufficient Funds (NSF) transactions within both QuickBooks Desktop and QuickBooks Online. Designed for clarity and high EEAT, the content offers users a range of verified methods, from utilizing the automated “Record Bounced Check” feature to executing detailed Manual Journal Entries to ensure maximum control and accuracy. The comprehensive instructions cover all necessary accounting actions: reversing the original customer payment, reinstating the outstanding balance, correctly categorizing the bank’s charge as an expense, and applying appropriate customer penalty fees as income, ultimately securing compliant and auditable financial records across all scenarios.
Highlights (Key facts and solutions taken directly)
When a check bounces, the bank declines to honor it and returns it to (the person or organization trying to cash or deposit it), often accompanied by a penalty fee for non-sufficient funds (NSF).
The common reasons for Bounced Checks are given below:
To prevent bounced checks, always check your balance, verify details, and use QuickBooks to track payments.
When recording a returned or bounced check, several key details must be documented to ensure accurate financial records.
The necessary information you need to record is mentioned below:
There are different ways to record a bounced check in QuickBooks Desktop and Online:
QuickBooks Desktop helps you manage bounced checks effectively. Before you begin, review the situation carefully and follow the steps to update your records accurately.
The “bounce record feature” allows users to efficiently record and manage situations where customers’ payments are returned due to insufficient funds or other reasons.
Important Note: The bounced check must have already cleared the bank, so make sure the check is not still sitting in the Undeposited Funds account. If it is, the check cannot be marked as bounced yet.
These fields are mostly optional, but it’s helpful to enter relevant information for record-keeping:
This summary outlines the following actions:
| Unpaid Invoices | Bank Fee Deductions | Customer Fee Invoice |
|---|---|---|
| QuickBooks will mark any associated invoices as unpaid, reflecting that the customer’s payment has been reversed. | The bank fees you entered will be deducted from your bank account, if applicable. | If you’ve entered a customer fee, QuickBooks will create an invoice for this fee, charging the customer the specified amount. |
Manually entering a customer’s bounced check into QuickBooks requires a number of detailed processes to assure accuracy. Let the customer know about the returned check and any other costs or penalties they could be responsible for.
Note: This setup is a one-time task. Once you have completed this, you can move on to the next steps if you have already set it up before.
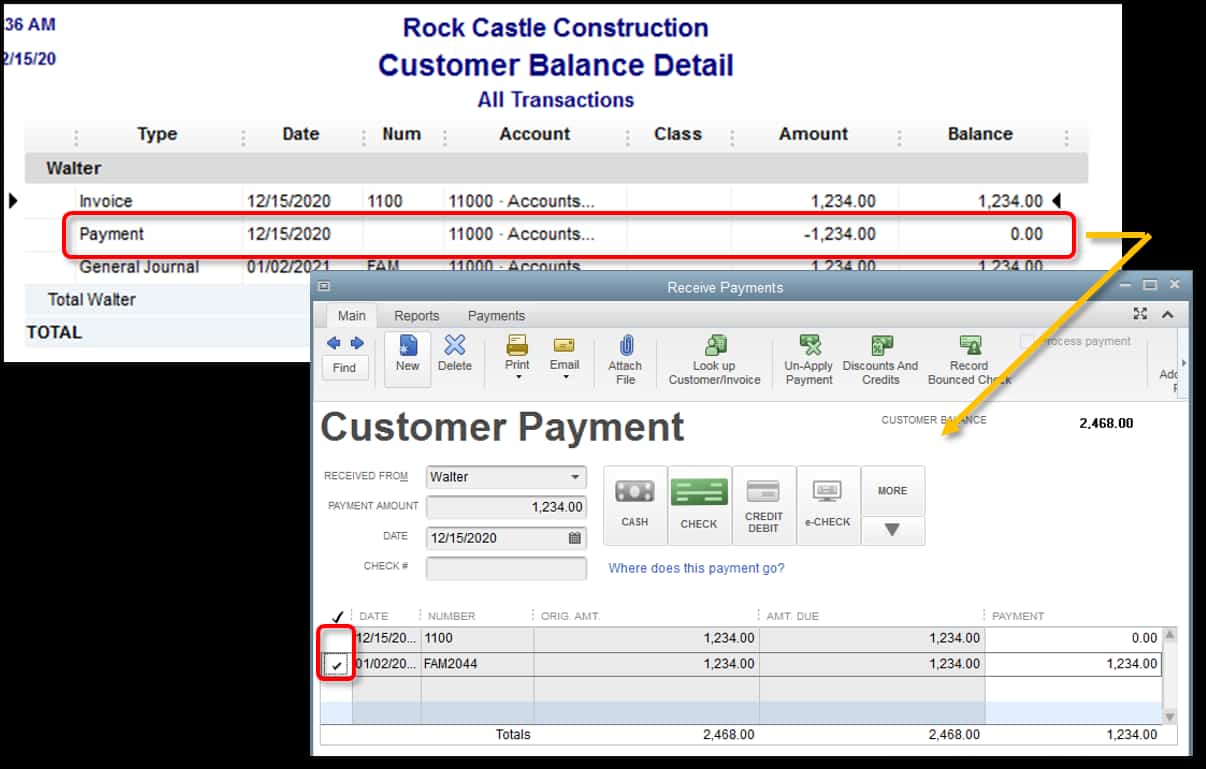
These steps ensure that the payment is properly adjusted for the bounced check:
If you want to follow up with the customer regarding the bounced check, you may want to resend the open invoice to remind them of the payment due. This is optional but can be a good practice for collection purposes.
In QuickBooks Desktop, recording a bounced check using journal entries allows you to manually reverse the original deposit and reinstate the customer’s balance. QuickBooks Desktop provides flexibility in creating detailed journal entries, enabling businesses to maintain comprehensive records of transactions. With its desktop-centric design, the process integrates seamlessly with other financial reports and statements, ensuring accuracy and clarity.
In QuickBooks Desktop, creating items for the bounced check fees is still the first step, just like in QuickBooks Online. This will allow you to charge your customer for the fee, and record the charges accurately in your accounts.
Repeat the process for the second item if you want to track the fee charged by the bank separately.
You will use a journal entry to record the bounced check in QuickBooks Desktop, the same as in QuickBooks Online. This will adjust both your Accounts Receivable and your Bank account to reflect the returned check.
On the first line:
On the second line:
In QuickBooks Desktop, clearing the original invoice and linking the bounced check involves adjusting the payment application.
This clears the original invoice and links the bounced check to the journal entry.
In QuickBooks Desktop, you will also need to record the bank’s service fee, just like in the online version.
Once you’ve recorded the bank service fee as an expense, you need to invoice the customer for this fee.
Just like in QuickBooks Online, you can generate and send a statement to the customer regarding the bounced check and related fees.
However, the process in QuickBooks Desktop is slightly different:
Finally, when the customer pays the invoice for the bounced check fee, you will need to record that payment.
The typical procedure is to debit an expense account like “Bad Debt Expense” or “Bounced Check Expense,” and credit the accounts receivable with the same amount to reflect that the payment is still owed. The cash account should also be adjusted with any bank fees incurred due to the bounced check by recording them as expenses. This ensures the company’s financial status is accurately reflected.
To record a customer’s bounced check with an expense in QuickBooks Desktop, follow these detailed steps:
Important Notes:
By following these steps, you can efficiently manage bounced checks and related expenses in QuickBooks Desktop.
Recording a bounced check in QuickBooks Desktop involves a few clear steps that ensure your financial records reflect the returned payment and the appropriate adjustments are made. By following this guide, you’ll learn how to handle bounced checks with ease, from recording the returned check to issuing a new invoice or credit. Whether it’s dealing with NSF (Non-Sufficient Funds) checks or managing bank fees, QuickBooks provides the tools you need to maintain accurate accounts and streamline your business’s financial processes.
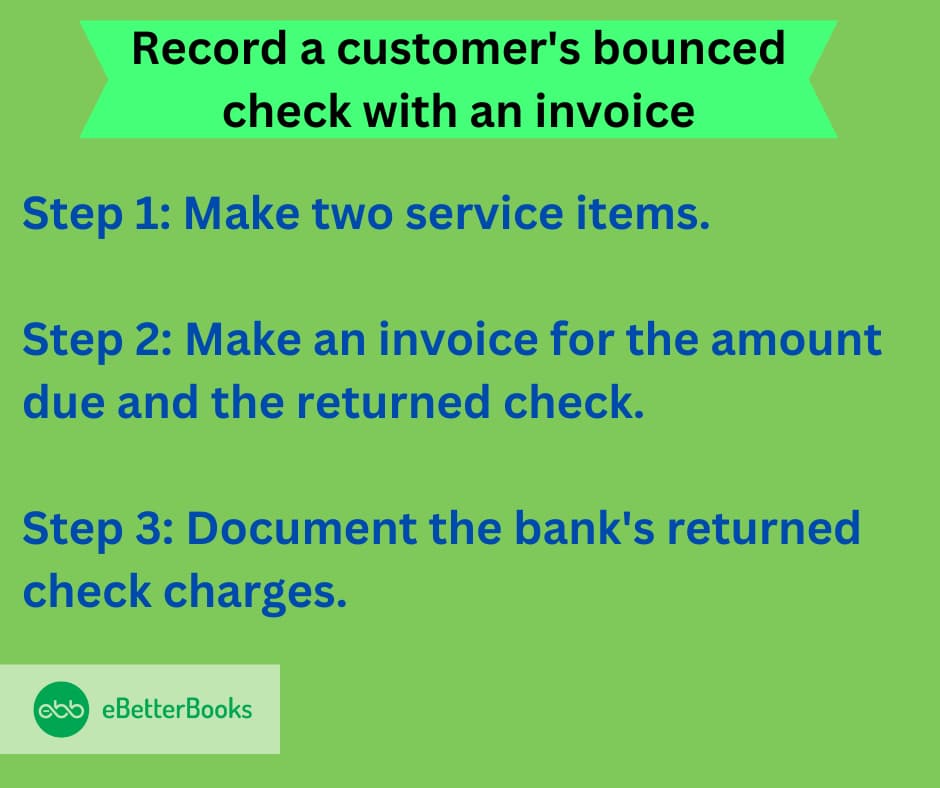
To record a bounced check using an invoice in QuickBooks Desktop, follow these detailed steps:
Before you can properly record a bounced check, you need to create an item for the bounced check fee.
By following these steps, you will successfully record a bounced check in QuickBooks Desktop while ensuring your accounts remain accurate and up-to-date.
When you write a check that bounces, it’s crucial to accurately record the transaction in QuickBooks Desktop to maintain accurate financial reporting. This guide will walk you through the process of handling a bounced check that you wrote, including how to reverse the payment, track any bank fees, and update your accounts accordingly.
By following these steps, you’ll ensure that your QuickBooks Desktop records reflect the true financial picture, preventing any discrepancies in your bank account and financial reports. Understanding how to properly record a bounced check will help you stay organized and maintain accurate bookkeeping.
You have to do this step only if the vendor charges you for the overdraft fee.
Rest assured, since you un-linked the original bill payment check from the bills, they were marked unpaid and should re-appear in the Pay Bills window for your convenience.
QuickBooks Online allows you to handle bounced checks with ease. Before you begin, review the situation carefully and follow the steps to ensure your records are updated accurately.
The process for recording a bounced check in QuickBooks Online is similar, but there are a few differences in terms of navigation and available features.
It allows you to locate the customer’s original payment, which is essential for tracking the transaction history and understanding the context of the bounced check.
Identifying the specific transaction helps accurately record the bounced check, prevent errors in your accounting records, and ensure that all transactions are accounted for.
Adjust your accounts to reflect that the payment still needs to be received by officially recording the bounced check, which maintains accurate financial statements and cash flow reports.
Now, you will initiate the process to record the bounced check:
This step ensures that both the customer’s account reflects the outstanding balance due to the bounced check and that any bank fees incurred are recorded which keeps your financial records comprehensive.
When a customer pays for the bounced check, follow the instructions below for re-recoding bounced check payment received:
Reviewing ensures all entries are accurate before finalizing them in QuickBooks, which helps prevent discrepancies in your financial records and ensures compliance with accounting standards.
As with QuickBooks Desktop, you should reach out to your customer and inform them of the bounced check and any charges that will be applied to their account. You can send the invoice for the customer fee through QuickBooks Online.
To manually record a customer’s bounced check in QuickBooks Online, follow these detailed steps:
In QuickBooks Online, you don’t need to use a journal entry for recording a bounced check. Instead, you will use a Sales Receipt or Invoice and possibly a Refund Receipt, depending on how the situation unfolds.
This is where QuickBooks Online simplifies things.
If your bank charges a fee for the bounced check, record it as an expense in QuickBooks Online.
If the customer re-pays after the check bounces, you can record the new payment:
In QuickBooks Online, recording bounced checks via journal entries emphasizes ease of access and real-time updates. The cloud-based system allows you to reverse the deposit and update the customer’s balance, ensuring that all entries are accurately reflected in your financial statements. QuickBooks Online’s intuitive interface and accessibility on multiple devices make it convenient for businesses to manage accounting workflows. Additionally, the platform’s real-time synchronization ensures that the changes are instantly available across teams and devices, enhancing collaboration and efficiency.
You’ll need two items:
Next, you need to clear the original invoice that was paid with the bounced check and link the check to the journal entry you just created.
Once the bank service fee is recorded, you need to create an invoice to charge the customer for the returned check.
Once the customer pays the invoice for the bounced check fee, you need to record the payment.
By following these steps, you can efficiently manage and record bounced checks in QuickBooks Online, ensuring your accounts are accurate and up-to-date.
The general approach is to debit an expense account, such as “Bad Debt Expense” or “Bounced Check Expense,” and credit the accounts receivable with the same amount to reflect the outstanding payment. Any bank fees incurred from the bounced check should be recorded as additional expenses in the cash account. This ensures that your financial records reflect the impact of the bounced check properly.
Here’s how to record a bounced check using an expense method in QuickBooks Online. This process involves creating an expense to reopen the invoice, accounting for any associated bank fees, and communicating the fees to the customer.
The first step is to ensure the bounced check payment is properly reflected in your accounts. This action will effectively reopen the original invoice that was paid by the bounced check.
Tip: If you don’t have a bank account linked to QuickBooks, or the payment hasn’t yet appeared, you can manually create an expense transaction to reflect the bounced payment and later match it to your bank account.
After reopening the original invoice, you need to unapply the bounced check payment so that it no longer shows as a paid invoice.
The final step is to send a statement to your customer, informing them of the bounced check and the bank fee.
For record purposes, clearly identify the invoice with a reference to the bounced check. This guide will walk you through how to reverse the initial payment entry, create an updated invoice, and communicate with your customer about the bounced check and remaining balance. These steps will help you streamline the process of managing bounced checks while ensuring your customer accounts and bank records remain aligned in QuickBooks Online.
Note: Keep in mind that the Customer Detail report might show an overstate amount for a bounced check when using this method. This happens because, unlike the Profit and Loss report, the Sales by Customer Detail report lists all sales, whether or not they are linked to income accounts.
1.1 Create an Item to Reverse the Payment
To properly record the reversal of a bounced check, you’ll need to create a service item that links directly to your bank account. This will allow the check amount to be reversed in your bank register.
How to do it:
1.2 Create an Item to Track Bank Service Charges
Next, you’ll need to create another service item for tracking any fees your bank charges for the bounced check. This item will help you account for the bank service charge separately.
How to do it:
2.1 Open the Invoice Screen
To record the bounced check and any associated fees, you will need to create an invoice for the customer.
How to do it:
2.2 Enter Customer and Invoice Details
How to do it:
2.3 Save the Invoice
After adding the items and amounts, click Save and Close to record the invoice.
3.1 Open the Expense Screen
Now, you’ll need to record the bank service charge for the bounced check.
How to do it:
3.2 Enter Bank and Service Charge Details
How to do it:
3.3 Save the Expense
4.1 Open the Receive Payment Screen
You’ll now need to record the payment from the customer who issued the bounced check.
How to do it:
4.2 Enter Payment Details
How to do it:
4.3 Save the Payment
This guide walks you through the steps to record a bounced check, ensuring your books stay accurate and up to date. By following these easy-to-follow steps, you will debit the checking account for the returned amount, credit your accounts payable, and make the necessary journal entries.
You now need to attach the bill payment to the journal entry and reassign it:
If a customer’s check bounces due to non-sufficient funds (NSF), you can record it in QuickBooks Desktop using the Record Bounced Check feature.
Steps to Record an NSF Check:
This ensures your records stay accurate while tracking the NSF check and related fees.
When a check bounces due to insufficient funds (NSF), banks often charge a fee. QuickBooks allows you to record these fees as an expense, ensuring accurate financial tracking. Here’s how you can apply bank fees to a bounced check in QuickBooks Online and QuickBooks Desktop.
Tracking bounced checks is crucial for maintaining accurate financial records. QuickBooks Online and Desktop allow you to generate reports to monitor bounced checks and their impact on your accounts.
Here’s how you can do it:
If you’ve mistakenly recorded a bounced check or need to remove it from your QuickBooks records, you can delete it easily. However, before making changes, ensure that deleting the entry won’t impact your financial reports or bank reconciliation.
Note: If the check is already reconciled, deleting it may cause discrepancies in your reconciliation. Instead of deleting, consider voiding it.
Pro Tip: If you need to remove the NSF fee or a bounced check invoice, delete them separately under the Sales or Expenses section.
If you need to remove a bounced check transaction in QuickBooks, you can either void or delete the transaction.
Here’s how:
| In QuickBooks Online | In QuickBooks Desktop |
|---|---|
| Navigate to Sales > All Sales. | Open the Accounts Payable register. |
| Locate the invoice associated with the bounced check. | Step: Locate the invoice associated with the bounced check. |
| Click the drop-down arrow in the Action column. | Click the drop-down arrow in the Action column. |
| Choose Void (recommended) or Delete. | Choose Void/Delete Bill/Bill Pmt-Check. |
| Confirm by selecting Void/Yes or Delete/No. | – |
If you need to reverse a bounced check in QuickBooks Online, you can do so by either creating a reversing journal entry or setting up a service item.
Here’s how:
These methods help you accurately record and manage bounced checks in QuickBooks Online while keeping your accounts balanced.
Tracking bounced checks in QuickBooks helps maintain accurate financial records and ensures you properly account for non-sufficient funds (NSF) transactions. QuickBooks provides different reports to help you monitor bounced checks, including customer transaction history, bank reports, and accounts receivable aging reports.
Steps to Track Bounced Checks in QuickBooks:
Step 1. Use the Customer Transaction Report
Step 2. Check Bank Reports for Returned Checks
Step 3. Review Accounts Receivable (A/R) Reports
Step 4. Run a Custom Report for NSF Transactions
Recording a bounced check in QuickBooks Desktop or Online is essential for maintaining accurate and up-to-date financial records. You can use the built-in tool if it’s available, or you can follow the manual steps to record any fees, adjust the customer’s balance, and notify them about the issue.
Still have questions? Explore our detailed FAQs


