Excerpt:
Mastering check writing and printing in QuickBooks Desktop requires understanding the two distinct payment workflows: Write Checks (for immediate, non-liability payments) and Enter Bills/Pay Bills (for managing and clearing Accounts Payable). Key setup procedures, such as configuring the printer alignment via the File menu's Printer Setup, are mandatory to ensure the text correctly fits the check stock. Users must also be aware of critical best practices, including always using QuickBooks compatible check stock and the accounting rule that requires voiding a mistaken check, rather than deleting it, to preserve the audit trail. Whether printing a single check or a large batch, the process is streamlined to automatically fill payee details and amounts, provided the initial setup is accurate.
 Add As A Preferred
Highlights (Key Facts & Solutions)
Overview
Unable to Print checks in QuickBooks desktop according to your needs or preferences? If yes, this blog is for you, so stay tuned until you find the right solution. QuickBooks is a robust accounting software introduced by Intuit for all small or mid-sized businesses. It allows you to keep track of income, expenses, and accounts receivable and payable, as well as enables you to monitor overall accounting activity.
QuickBooks is a versatile software that allows you to write and print checks directly from the software.
In addition to it, the users can pay vendors, employees, or other general expenses and print a single check or multiple checks based on their requirements.
QuickBooks offers two ways to manage your bills and bill payments: Write Checks and Enter Bills.
“Write Checks” is the most convenient way to Register Payments. It must be used when you want to pay bills, when you receive them, or when no bill is accepted.
“Enter Bills” is a recommended way to include bills in QuickBooks used to record transactions that are to be paid at a future date, including expenses incurred, materials purchased, or services provided by a vendor. This way, you can keep track of all your accounts payables and know what or when a bill needs to be paid.

QuickBooks Desktop comes with various features that streamline your check printing process.
It enables you to:
After printing checks directly from QuickBooks Desktop, the payee details are completed automatically from your vendor contact information. The amount is also finalized for the bills that have already been registered. You can pay multiple bills at once with the same check.
Below are the methods you need to implement for printing checks in QuickBooks Desktop; let’s get started.
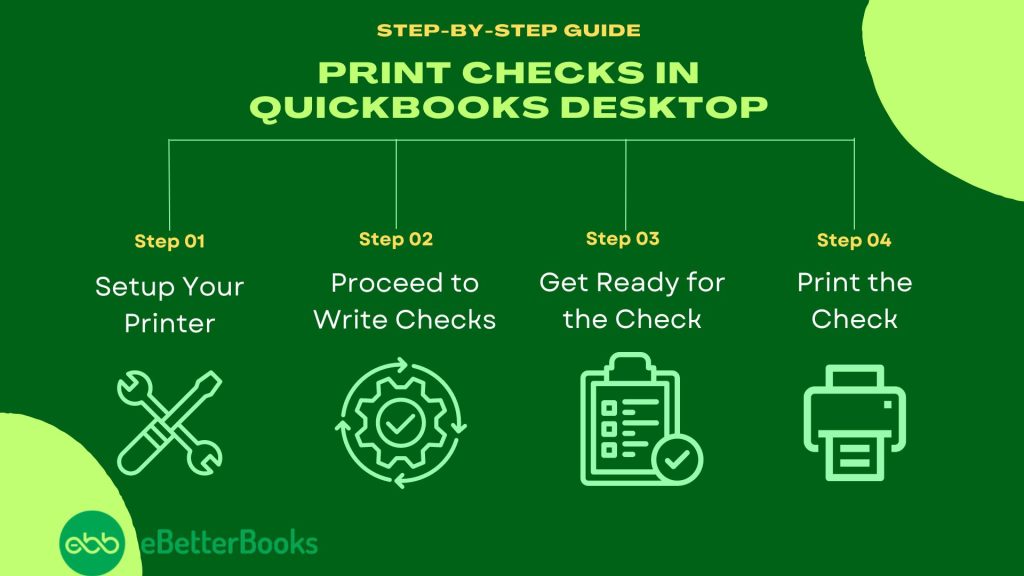
Here’s How to Print Checks When Bills are Received in QuickBooks Desktop:
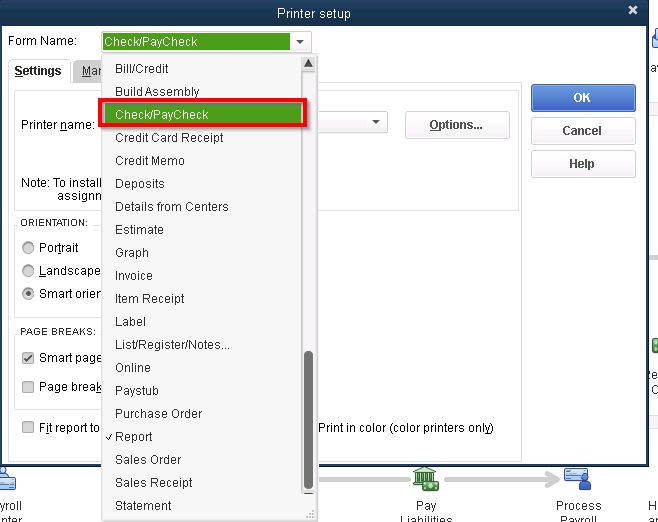
Before Printing your checks, ensure your printer is properly set up in the QuickBooks Desktop.
To set up your printer, do the following:
QuickBooks Desktop will now start showing the Write Checks window.
To prepare your check, you need to provide the required details on QuickBooks Desktop, which includes:
And lastly, hit the Save icon at the top of the Write Checks screen, but wait to close the window.
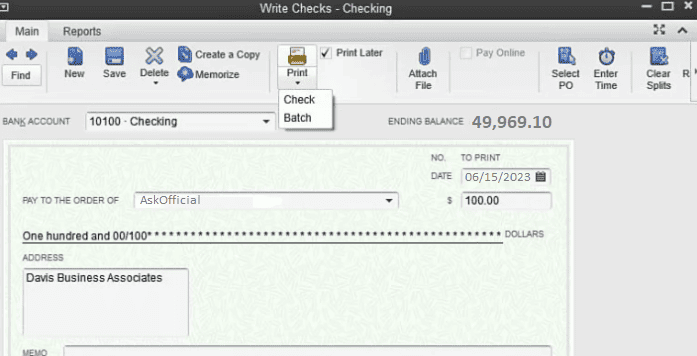
Now, it’s easier to print checks individually or print multiple checks simultaneously. You need to hit the drop-down menu from the Print icon located at the top of the Write Checks window to select.
Below are the steps to print checks one at a time or perform batch printing; let’s have a look:
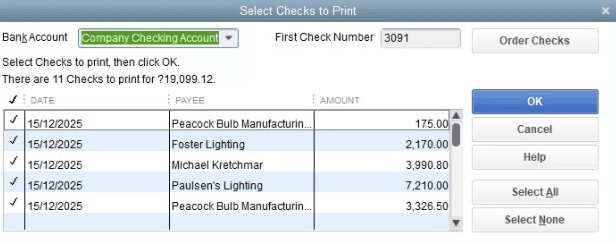
Batch: To print multiple checks you marked for Print Later. When you choose this option, you will be redirected to the Select Checks to Print window. You just have to click on your printer and put a checkmark on the check(s) you want to print, then select OK.
Once you are done with preparing a check, click Save & New, then repeat the same process to create all the required checks. Make sure that all checks have the Print Later box placed at the top of the Write Checks window. Select the drop-down menu in the print icon from the final check and click Batch.
The Select Checks to Print screen will start displaying all checks that have been created but not printed yet.
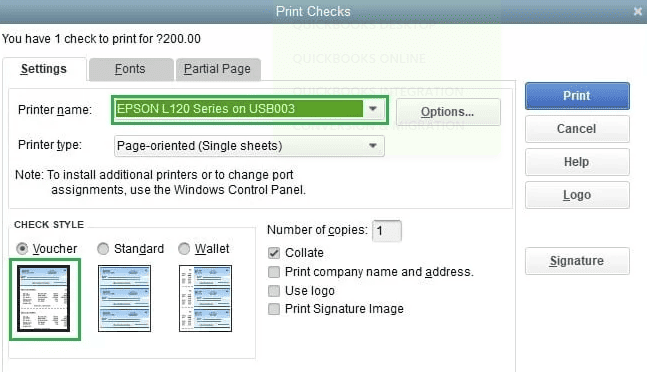
In the Print Checks window:
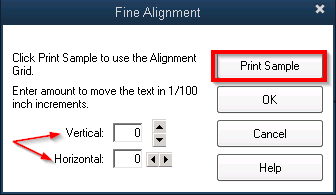
You can easily adjust the position of the printed text on your checks using the Alignment Grid. This lets you fine-tune the horizontal and vertical placement to make sure everything lines up perfectly. Additionally, you’ll have to select Voucher (8 1/2″ x 11″) as the check style to ensure that the check will align with the envelope.
Here’s how you can do it:
In the Vendors menu on your QuickBooks Desktop home page, choose Pay Bills, as shown below.
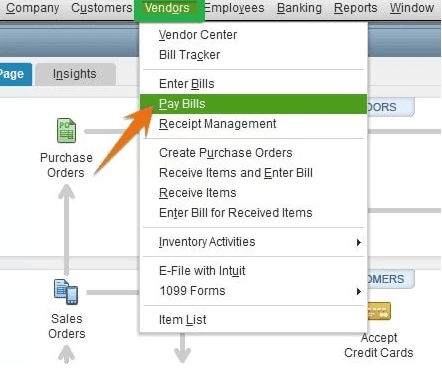
A screen displaying the list of bills already entered in the QuickBooks Desktop will show up. Herein, hit the checkbox on the left side to choose the bill or bills you must pay.
To create the check in QuickBooks Desktop, you are supposed to add the required information described below:
You must hit on the Pay Selected Bills option to create the checks.
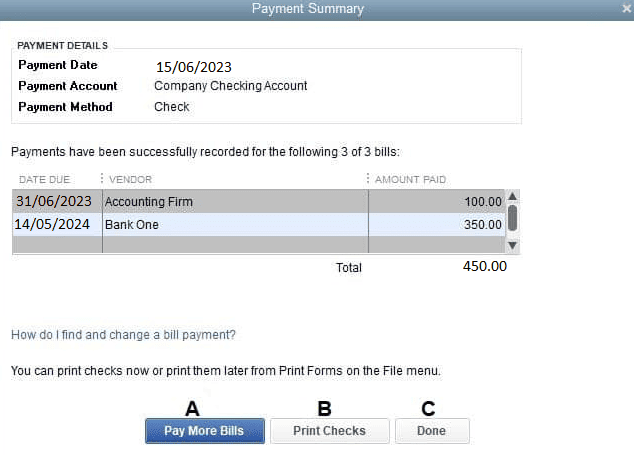
After hitting the Pay Selected Bills option, QuickBooks will show a payment summary.
You will be able to:
To find the unprinted checks later on, select Print Checks under the Banking section of your home page.
QuickBooks Desktop supports three types of checks (Voucher Checks, Standard Checks, Wallet Checks):
To print checks in QuickBooks Desktop, simply select the type of check, customize the print settings, and print using your preferred printer.
Regular checks are commonly used in QuickBooks Desktop to cover a range of expenses, including:
They can also be utilized to pay credit card debts or deposit funds into a petty cash account. To initiate writing a check, navigate to the Banking menu and select Write Checks.
When writing a check, you will need to fill out several key fields:
In addition to regular checks, QuickBooks Desktop allows for other types of checks:
To void a blank check in QuickBooks follow the below steps:
QuickBooks Desktop provides a convenient means for writing and printing out checks for your business. Writing, printing, and even repaying bills, reimbursing employees, or maintaining accounts payable with vendors just gets easier. With the basic setup steps provided in the instructions, you can effortlessly configure your printer, make out checks, and then print them one at a time or in batches.
But if you still facing any kind of issues with your software and need professional assistance, regarding accounting, bookkeeping & accounting software-related issues then feel free to get in touch with us at +1-802-778-9005, or you can mail us at: support@ebetterbooks.comprinter driver is set to print the last page first. The primary fix is to adjust the page order settings within QuickBooks.
Still have questions ? Explore our detailed FAQs.


