Excerpt:
This article provides a detailed, step-by-step guide to help you transfer your QuickBooks data seamlessly from an old computer to a new one. It covers methods like creating backups, using the Migrator Tool, and manually restoring files. Whether you’re upgrading your system or solving performance issues, this guide ensures you can transfer your QuickBooks company files without data loss, saving time and effort for your business’s continued operations.

Moving QuickBooks Desktop requires careful preparation and execution to prevent data loss and system disruption. The guide details three primary methods: the straightforward QuickBooks Migrator Tool (available in U.S. versions of QBD 2018 and newer), the traditional Backup and Restore procedure, and a detailed Manual Transfer process. Critical initial steps include confirming matching QBD versions on both machines, transferring license data, and ensuring a verified, single-user mode backup is created. The content also provides essential file path information for manually relocating components not included in standard backups, such as custom templates and printer settings. Finally, it emphasizes a post-migration validation checklist, recommending users compare report balances and test new transaction entries to guarantee the new setup is fully accurate and functional.
Highlights (Key Facts & Solutions)
.qbw), the Transaction Log file (.tlg – vital for recovery), and the Network Data file (.nd – vital for multi-user setups)..qbw backup and must be manually copied from specific C:\Program Data\Intuit\QuickBooks [version] directories.Your QuickBooks files must be moved from one computer to another to transfer QuickBooks file to a new computer. Depending on the specifics of each case, many explanations may be given for this move. To avoid any data loss, it is essential to guarantee a smooth workflow. Certain measures must be taken for each process, whether you need to transfer files between computers on the same network or to an individual computer. You may need to relocate your QuickBooks company files for several reasons, including problem-solving or moving your accounting data to a new computer. Whatever the cause, you must look for guidelines on moving a QuickBooks company file and completing the process.
Before transferring your data to a new computer, following a few basic rules is important. Before beginning the company file migration, please make sure that you have met the following requirements:
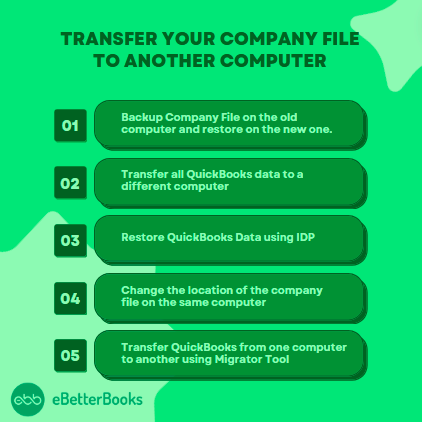
Easily transfer your QuickBooks company file to a new computer by Backing up your file on the old computer, transfer it via external storage or cloud, restore it on the new system, and adjust settings as needed. For a smoother transition, use QuickBooks Migrator Tool if available. Follow Step by Step guide for smoother transition…
Log into your Intuit Data Protect (IDP) account on your old computer and transfer the backup file to the IDP’s online backup storage. As a result, your data will be securely stored on the cloud.
You must know the files transferred and recovered through IDP when learning how to transfer a company file to a QuickBooks desktop.
There are many different kinds of files connected to your QuickBooks data under the QB data folder
Here are a few examples:
Other files and add-ons may be discovered in numerous locations within QuickBooks, in addition to those found in the QB data folder
Here are a few illustrations:
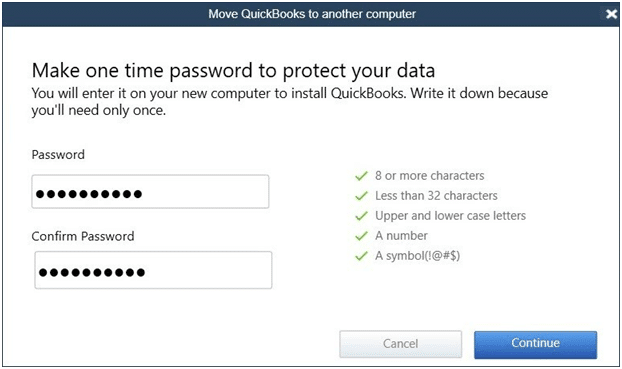
Try the Migrator Tool if you need help understanding how to transfer QuickBooks file to a new computer. Everything will go smoothly if you utilize QuickBooks Desktop in single-user mode and not via a network. The Migrator Tool can assist you in moving QB Desktop and up to three other company files to a new computer when you utilize the US version of QuickBooks Desktop 2018 or newer as a single user.
There must be a data backup from add-ons like Loan Manager by QuickBooks. Therefore, you must learn to independently transfer a QuickBooks company file to another computer if this information is required.
The following are the steps:
Now, copy and paste the files to the places noted in the following table:
| Filenames | Locations |
| QuickBooks Letters and Templates | C:\Program Data\Intuit\QuickBooks [version]\QuickBooks Letter Templates |
| Printer Setting (PrintEng.ini, wpr.ini, and QBPrint.qbp) | C:\Program Data\Intuit\QuickBooks [version] |
| Spell Checker (spell.ini and UserDictionary.tlx) | C:\Program Data\Intuit\QuickBooks [version] |
| Financial Statement Designer (FSD clients) | C:\Program Data\Intuit\Intuit\QuickBooks\Company Files\FSD\ClientsNote: For Windows 7, the path is C:\Program Data\Intuit\ |
| Financial Statement Designer (FSD data) | C:\Program Data\Intuit\QuickBooks [version]\Components\FSD\Data |
| Cash Flow Projector (.cfp) | [Company Name].qbw |
| Business Planner (.bpw) | [Company Name].qbw |
| Loan Manager (.lmr) | [Company Name].qbw |
The migration tool copies all the necessary data to run QuickBooks Desktop, including:
This ensures that your QuickBooks experience remains consistent on the new computer.
When moving QuickBooks to a new computer, make sure you meet the following requirements:
On the Old Computer:

On the New Computer:
Note: This will depend on the speed of your computer and internet, and the size of your company files.
Important: If the migrator doesn’t open after selecting and running the file, you may need to update your Windows 10 version.
The migrator tool automatically removes your QuickBooks files from your USB flash drive once you’re done. Your QuickBooks files will still be on your old computer. It is recommended you rename the file(s) on the old computer to avoid using the wrong file.
What to Do Next?
Since the tool doesn’t copy some info, you might need to take a few more steps to get up and running on the new computer.
Depending on what you have on the old computer, you might need to:
You can copy all the data needed to get QuickBooks Desktop up-and-running on your new computer. None of your data is deleted from your old computer.
The tool will copy:
The Tool Won’t Copy:
Users can manually transfer QuickBooks from an old computer to a new computer.
Follow these below steps:
On a Computer with No Network
On a Dedicated Server or Workstations
You can use these steps to install QuickBooks on either a dedicated server or computers that access the data on a server. This can also be a Terminal server or a server that hosts both QuickBooks and your company file.
When you access your company file from a server, make sure you’re using the direct path to your company file.
These steps will help you to manually transfer QuickBooks Desktop from the old computer to the new one. The information provided here satisfactorily answers your question about how to manually transfer QuickBooks files to a new computer.
Some common new computer installation errors and solutions are as follows:
Before considering your data migration complete, make sure these pointers:
The Final Word!
Hopefully, the information given above will be useful to you. But if you are still facing any kind of issues with your software and need professional assistance regarding accounting, bookkeeping & accounting software-related issues, then feel free to get technical support with us at +1-802-778-9005, or you can email us at support@ebetterbooks.com
The QuickBooks Migrator Tool is an official Intuit utility designed to simplify transferring QuickBooks Desktop and its data files to a new computer. It automates the process of moving the program, activation details, and associated data files.
Switching to Single-User Mode is a mandatory step that grants the software exclusive access to the company file. This is crucial for maintaining data integrity during critical operations like backing up.
.qbb) file.The Migrator Tool omits certain configurations and data elements, requiring users to manually re-establish them on the new computer. This is often done for security or because the configurations are environment-specific:
Understanding the QuickBooks file structure is essential for troubleshooting and manual data migration. The core files include:
.qbw): The primary file containing all accounting data, transactions, and settings..qbb): A compressed copy of the .qbw file created for data restoration..tlg): A running log of all changes made to the corresponding .qbw file since the last backup. It is crucial for data recovery and integrity checks..nd): Created when Multi-user Mode is used, this file stores configuration settings that help QuickBooks manage user access over a network..qbm): A highly compressed version of the company file, mainly used for emailing or moving the file.Custom forms, templates, and printer preferences are saved outside the main company file and are not included in the standard .qbb backup file. They must be manually copied from the old computer’s local hard drive to the new one.
The standard installation paths on a Windows PC are:
PrintEng.ini, wpr.ini, and QBPrint.qbp): C:\Program Data\Intuit\QuickBooks [version]C:\Program Data\Intuit\QuickBooks [version]\QuickBooks Letter TemplatesNote: [version] represents the two-digit year of your QuickBooks Desktop product (e.g., QuickBooks 2024 is version 34, but the path often uses the year). After restoring the backup, the customized files should be found in a temporary folder named Restored_CompanyName_Files located next to the restored .qbw file, from where they must be copied to the correct location.
Errors like “Migration Failed Unexpectedly” or messages about corrupted data often occur due to file damage, incompatible settings, or path issues. Key solutions include:
C:\QuickBooks Files\Company Data\MyCompany.QBW).The final data validation checklist is a critical, professional step required to confirm the completeness and accuracy of all financial data post-transfer. A successful migration message only confirms the file was copied, not that every transaction is correctly linked or that all account balances are perfect.
Essential validation steps include:

