Excerpt:
This article helps you restore your QuickBooks company file backup, ensuring your essential data is recovered in case of file corruption, deletion, or system crashes. It offers a step-by-step guide to restore your backup file (.qbb) to a new company file (.qbw), protecting your business from data loss due to power outages, malware, or hardware failure. It also covers restoring backup files in QuickBooks Desktop Point of Sale for seamless recovery.
 Add As A Preferred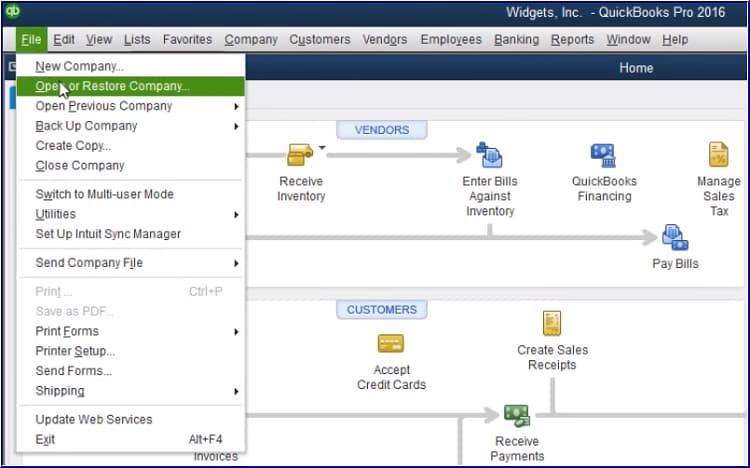
Protecting business financial data necessitates routine use of QuickBooks Desktop’s backup and restore functions to safeguard against file corruption, hardware failure, or other data loss events. The system creates a compressed backup file, identified by the .qbb extension, which comprehensively captures accounting data, lists, and templates; however, Payroll Forms must be secured through a separate manual process. When data damage occurs, the protocol requires users to first employ the internal Verify Data tool to diagnose the issue, followed by Rebuild Data to attempt automatic repairs. If repair fails, the restoration process converts the secure .qbb backup into a new, active company file (.qbw). A critical security step during restoration is the obligation to select a unique file name and new storage location to prevent accidentally overwriting the existing, potentially corrupt, company file. This structured procedure is vital for maintaining business continuity and preserving accurate financial records.
Highlights (Key Facts & Solutions)
.qbb) into a new, usable company file (.qbw)..qbw file..qbb backup was created will be missing from the restored file and must be manually re-entered or recovered using advanced Auto Data Recovery tools..qpb for backups).There are a variety of situations in which you are required to create your company file backup; a few of them are as follows:
The searchable value or file extension for QB Backups is *.qbb, and its default location is: C:\Users\Public\Public Documents\Intuit\QuickBooks.
Backing up your company data in QuickBooks Desktop is crucial for data security and recovery. Here’s a detailed guide on how to perform this task effectively.
Step 1: Access the Backup Menu
Step 2: Choose Backup Type
Step 3: Select Local Backup
Step 4: Choose Backup Location
Step 5: Save on Local or External Devices
Step 6: Setup Preferences
After selecting the location for your backup data, you need to proceed to set up your backup preferences:
Step 7: Confirm Saving Process
Step 8: Choose Backup Timing
Step 9: Recommended Scheduling Option
Step 10: Schedule Backup Settings
Once you opt for scheduling, you’ll be prompted to set up how often backups occur:
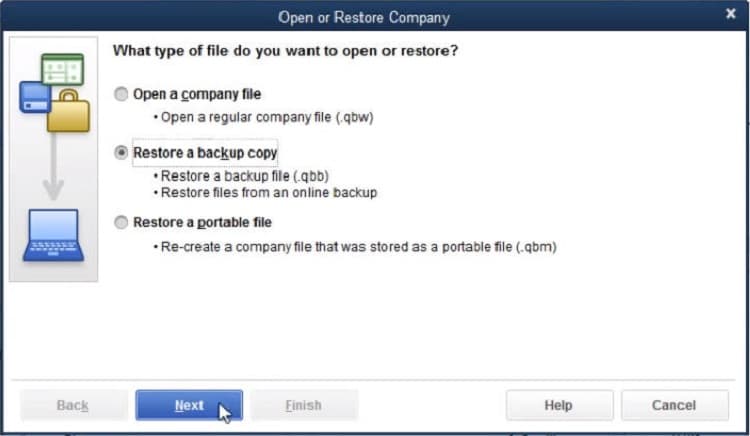
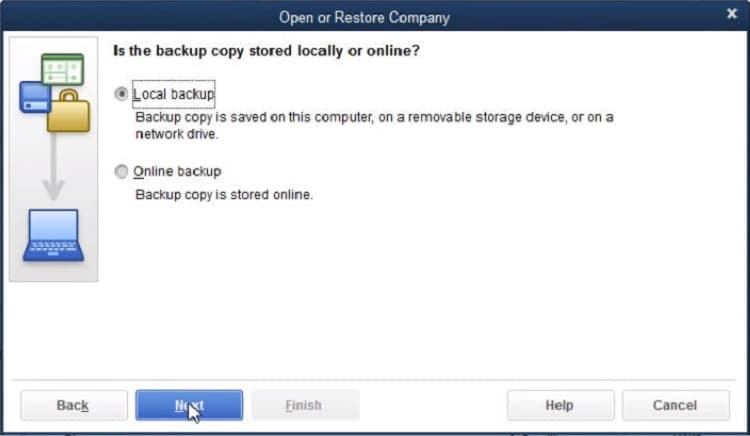
When you restore a backup file, QuickBooks makes use of the backup company file (.qbb) to create a new company file (.qbw).
Important: Make sure you move your backup file to your local hard drive if it is available on an external device like a USB or a hosting service like Box. Then, adhere to the steps below.
Creating backup files in QuickBooks Desktop Point of Sale is important to secure your data against potential loss due to software issues, data corruption or hardware failures.
Steps to create a backup:
Step 1: Access the Backup Option
Step 2: Specify Backup Location
Step 3: Complete the Backup Process
Proceed by clicking on Backup after selecting your preferred location. This action will prompt QuickBooks to start creating the backup file. Once the process is complete, click Finish to conclude the operation.
A backup is basically a compressed copy of your data saved at a location outside the company data folder. Before you open this data in QuickBooks Desktop Point of Sale, it is mandatory to restore the backup file.
Note: The restored data will replace the data in the existing file if you restore a file to a name already in a default folder.
QuickBooks Desktop Point of Sale will restore (decompress) and copy the backup files into your working directory. You’ll get a prompt to insert sequential restore disks if it’s required.
Still have questions? Explore our detailed FAQs.


