Excerpt:
QuickBooks offers an essential "Stop Payment" feature, allowing businesses to cancel erroneous or fraudulent payments, preventing financial losses and maintaining accurate records. By properly recording stop payments, you ensure security, avoid penalties, and safeguard cash flow. Whether using QuickBooks Desktop or Online, the process ensures precise financial management and supports transparency in accounting, making it easier to handle disputes and track adjustments.
 Add As A Preferred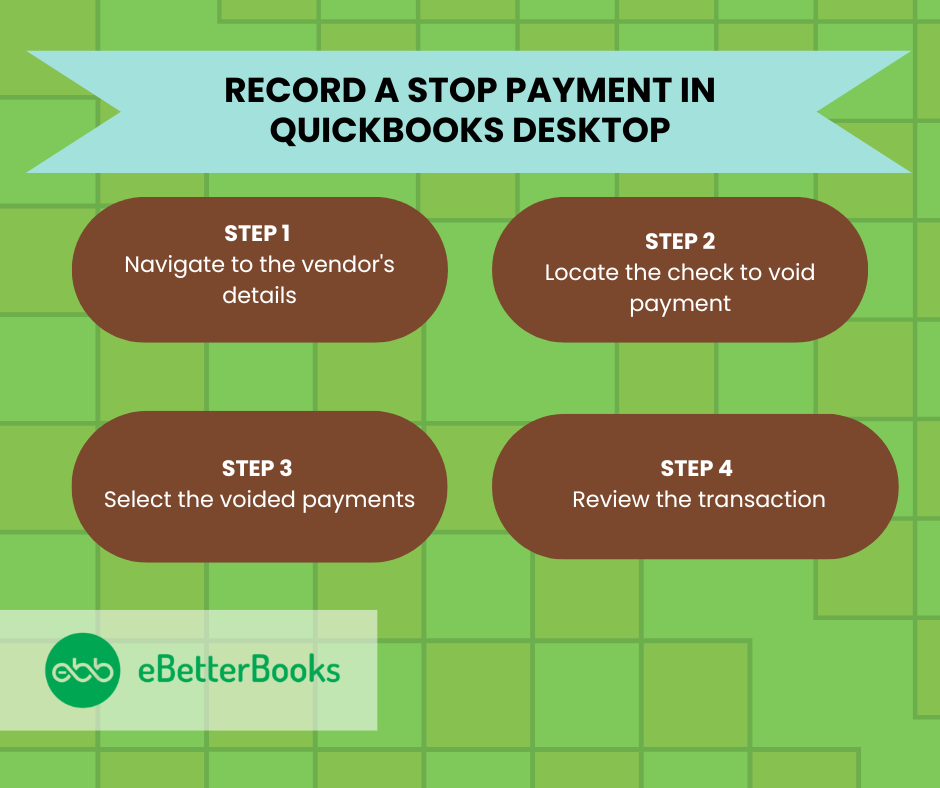
The guide’s primary purpose is to move beyond simple data entry, providing a complete financial control strategy centered on stop payments. It emphasizes that a stop payment is a strategic tool for security and control over business finances, enabling immediate action against errors, fraud, or disputes. Crucially, the content dedicates significant focus to the different financial impacts and proper procedures for QBD versus QBO, specifically contrasting the risk levels of Voiding a transaction (which maintains an audit trail) versus Deleting it (which erases history).
Highlights (Key Facts and Procedures)
The following points represent the most critical, fact-checked takeaways and procedures directly supported by the article’s detailed instructions:
To learn the best way to stop payment in QuickBooks, you can either delete the paycheck, edit the paycheck, or void it.
In QuickBooks Desktop there’s a field for bank fees when you reconcile the account. At that point you can enter the fee for the ‘stop payment’ here and then choose the appropriate expense account.
To record a stop payment in QuickBooks Desktop, void the contractor’s payment by navigating to Vendor Center, selecting the check, and voiding it. Then, send payroll data and review the transaction.
Following the step-by-step information below:
To void a contractor payment in QuickBooks Desktop, go to the Vendor Center, select the vendor, locate the check, and choose “Void.” The check amount will update to $0.00.
Step 1: Navigate to the Vendor’s Details
Step 2: Locate the Check to Void Payment
To process a stop payment in QuickBooks Desktop, select the voided payments under the Employees menu, click “Send All,” review the transaction details, enter your PIN, and click OK.
Step 1: Select the Voided Payments
Step 2: Review the Transaction
Journal entries are complex for non-accountants. Typically, the Debit line will be the Cash/Bank Account (to reverse the assumed withdrawal), and the Credit line will be the Accounts Payable or Expense account (to reverse the initial payment record).
To record a stop payment in QuickBooks Online, create a journal entry with debits and credits, add a memo, and save. For unprocessed payments, navigate to Vendors, select the payment, and choose to delete or void it.
Steps to recording a stop payment or processed direct deposit payments:
Step 1: Select the Journal Entry Menu
Step 2: Enter the Journal entry Details
Step 3: Mention the Details in the Memo Section
Step 4: Save the Journal Entry
Steps to stop recording stop payment or unprocessed direct deposit payments or non-direct deposit payments
Step 1: Navigate to the Vendor
Step 2: Confirm the Void/ Delete Action
Step 3: Verify the Transaction
Understanding how to record a stop payment is only part of the process—real control comes from knowing what surrounds it. The following sub topics break down the most critical areas often overlooked when handling voided transactions, maintaining payroll accuracy, and preventing reporting errors. Each point gives you a clear, actionable view to protect your records, avoid financial missteps, and ensure compliance inside QuickBooks.
Voiding a transaction in QuickBooks needs clarity, timing, and record alignment. Always record the void with a clear memo to ensure traceability, update the impacted accounts immediately to reflect accurate balances, and notify affected parties like vendors or employees if the void relates to a payment or paycheck. Use the void option only when the transaction has been recorded but not processed by the bank. For audit purposes, retain the original transaction with the void status rather than deleting it. Also, make sure to reconcile your bank and accounting records right after the void to avoid future mismatches.
Avoiding errors starts with precision. Never delete a processed transaction, as it erases audit trails, affects reports, and confuses reconciliations. Don’t forget to add memos or notes—missing context leads to miscommunication, compliance issues, and extra work during audits. Avoid skipping reconciliation after stop payments, as it causes discrepancies in reports, impacts cash flow visibility, and delays financial closing. Make sure you record the bank’s stop payment fee immediately to reflect actual expenses. Lastly, don’t void direct deposit payments after payroll is sent, as funds won’t return automatically and can mislead your balance sheet.
Stop payments directly impact your bank reconciliation process, especially when voided or deleted checks remain uncleared. These actions cause unmatched transactions, create timing issues, and lead to incorrect cash balances. In reports, improperly recorded stop payments distort expense totals, affect vendor payment history, and skew monthly summaries. Always reconcile voided transactions against bank statements to avoid misreporting. Use filters in reconciliation tools to track voided or stopped payments separately, enabling faster audits, clearer adjustments, and accurate month-end closings. Ignoring these details leads to reporting gaps, financial confusion, and compliance issues.
Each action serves a distinct purpose. Voiding keeps the record with a $0 amount, useful for audits, historical tracking, and reconciliation. Deleting removes the transaction entirely, which is risky if the payment was processed, reported, or linked to payroll. Editing is ideal before processing, allowing changes to date, amount, or payee without affecting reports or history. Use void for transparency, delete only for errors caught early, and edit only before submission. Misusing these options can break transaction trails, cause tax reporting issues, and confuse bank reconciliation efforts.
Stop payments can delay employee payouts, create mismatches in payroll summaries, and confuse direct deposit timelines. If not recorded properly, they can affect tax liability reports, misstate year-to-date totals, and lead to IRS discrepancies. Always void or edit paychecks before payroll is submitted to ensure W-2 and 941 forms remain accurate. Failing to do so may result in duplicate entries, incorrect net pay reporting, and end-of-year tax errors. Consistent communication with your payroll provider ensures faster corrections, reduced penalties, and accurate financial compliance.
Recording a stop payment accurately is essential, but understanding the surrounding processes and potential risks gives your financial management an extra layer of strength. This section offers practical insights into fees, compliance, communication, and expert guidance that enhance how you handle stop payments in QuickBooks. These topics are designed to help you avoid common pitfalls, stay legally protected, and maintain operational clarity—ensuring your accounting system works smarter, not harder.
Banks typically charge a stop payment fee ranging from $15 to $35, depending on the account type, transaction method, and timing. These fees can impact expense tracking, especially if not recorded under the correct account in QuickBooks. Always log the fee under ‘Bank Charges’ during reconciliation to maintain expense accuracy, audit readiness, and cash flow transparency. If the stop payment is renewed after expiry (usually 6 months), additional fees apply, which must be tracked. Ignoring these fees can distort your net expenses, misalign budgets, and lead to overlooked financial obligations.
Note that if a stop payment order expires (usually after 6 months) and you need to renew it, you will likely incur a new, separate fee for the renewal.
Stop payments carry legal weight in business contracts, especially when tied to vendor agreements, payroll, or disputed invoices. Incorrect handling can lead to breach of contract claims, loss of trust, or even litigation risks. In regulated industries, failing to document stop payments properly may violate audit standards, trigger penalties, and flag compliance issues. Always maintain a written reason, approval record, and transaction trail to protect your company legally. QuickBooks helps you stay compliant by enabling audit logs, memos, and controlled void actions, which preserve transparency and protect against future disputes.
Clear communication is key when issuing a stop payment. Always notify the vendor or employee immediately, explaining the reason, expected resolution, and next steps. Use email for written proof, phone calls for clarity, and update notes within QuickBooks for internal tracking. If a replacement payment is planned, confirm revised amounts, dates, and method to prevent duplicate payouts or confusion. Miscommunication can lead to damaged relationships, delayed services, and trust issues. Document every interaction to ensure accountability, transparency, and financial consistency in both your records and business operations.
QuickBooks’ audit trail feature lets you track every edit, void, or deletion, including the user who made it, time stamp, and changes applied. This is essential for fraud prevention, error detection, and accountability in financial workflows. To enable transparency, regularly review the audit trail report, especially after processing stop payments or voids. It helps identify unauthorized changes, overlooked adjustments, and inconsistent entries. By maintaining a clean audit history, your business gains stronger internal controls, easier audits, and reliable transaction history, which are crucial for long-term compliance and trust.
If a stop payment involves large sums, tax-sensitive transactions, or recurring errors, consult a financial advisor or accountant. These professionals can assess risks, ensure proper classification, and maintain audit-proof documentation. They help verify if voiding, editing, or journal entries are the right approach, especially when dealing with payroll, vendors, or legal disputes. Seeking expert guidance also protects against regulatory missteps, tax reporting mistakes, and balance sheet inaccuracies. In complex cases, their support ensures compliance, clarity, and confident decision-making within QuickBooks and your broader financial strategy.
Conclusion!
A stop payment that is properly documented can help protect against future problems with creditors and vendors by demonstrating the purpose and approval of the stopped transaction. Ensuring the accuracy of your financial records and their reflection of your company’s real-time transactions is ensured by recording a stop payment in QuickBooks.
You maintain an accurate and transparent accounting system, which is necessary for efficient financial oversight and decision-making, by carefully handling stop payments in QuickBooks.
Voiding a direct deposit in QuickBooks does not automatically pull the money back; it only zeros out your internal records. You must immediately contact your payroll provider to initiate a direct deposit reversal. Reversals are not guaranteed and must be requested within 1-5 banking days (varies by bank). If the reversal fails, you will need to recover the funds directly from the employee, often leading to a challenging Accounts Receivable situation.
You should never delete a transaction that has already cleared the bank. Deleting it erases the audit trail and breaks the link between your accounting records and your bank statement, making future bank reconciliations impossible and potentially leading to fraud risks. Always Void a cleared transaction instead. Voiding sets the dollar amount to $0.00 but preserves the transaction history, date, and check number for audit purposes.
While you can use ‘Bank Service Charge,’ creating a specific expense account like ‘Stop Payment Fees & Penalties’ is the best practice for accurate reporting. This allows you to track, analyze, and budget for non-standard, avoidable bank expenses separately from routine fees. Detailed tracking is essential for informed financial oversight and during an audit.
In QuickBooks Desktop, go to Reports > Accountant & Taxes > Audit Trail. In QuickBooks Online, go to Settings (gear icon) > Audit Log. Search the report using the date or the name of the user who performed the action. A successful Void will show the transaction listed with the status change. Delete will simply show the original entry followed by a Deletion status, which should be flagged for review.
The most critical step is to update the original bill/invoice immediately after voiding the first payment. Go back to the original bill and ensure the status is changed back from “Paid” to “Open” or “Unpaid.” If the bill remains marked as paid, your accounting team may overlook it and create a duplicate payment when processing the next batch of invoices.
Yes, it can. If the stop payment is issued without justification (i.e., you stop payment solely due to insufficient funds without immediate remediation, or without a valid dispute), the vendor may view it as a breach of contract or refusal to pay for services rendered. Always document a clear, legally defensible reason (like fraud or major dispute) and notify the vendor in writing immediately to mitigate legal risk.
If the payment has not been sent/cleared by the bank, simply deleting the transaction is the most efficient method, as it removes the record entirely. However, if the payment was sent and the bank stop-payment process has been initiated, use the Journal Entry method to reverse the bank’s assumed withdrawal and keep a clear audit trail of the reversal, even though the original check is now void.


