What is QuickBooks Self-Employed?
QuickBooks Self-Employed is a cloud-based accounting tool tailored for freelancers, real estate agents, and consultants. It simplifies tracking your income, expenses, and client mileage, and includes a tax bundle for filing. Ideal for those who mix personal and business finances, it offers an efficient, scaled-down version of QuickBooks Online to streamline and automate your accounting software.
Understanding How To Login Into QB Self-Employed And Resolving QuickBooks Unable To Login In QBSE Error
QuickBooks Self-Employed is one of the greatest options for contractors or freelancers who need to keep track of their business’s income and spending. It is specifically intended for a sole proprietor who needs less assistance to remain organized but less than an organization.
Users may occasionally have login issues with QuickBooks Online or aren’t aware of how to log into their QB Self-Employed account. When they select the login button, either nothing happens or other error codes appear.
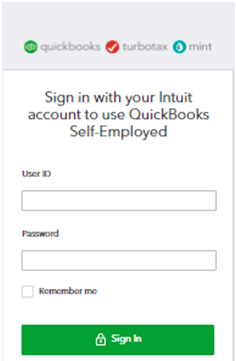
How Do I Login To My QuickBooks Self-Employed Account?
Any browser on a system can be used to access the QuickBooks Self-Employed software.
You can utilize the Self-Employed Version on a web browser by following the steps below:
Note: You must have an existing account or create an Account to complete the login process.
- Step: Navigate to QuickBooks’s official website.
- Step: Log in with your Login credentials. (create an account if you don’t already have one.)
- You have now logged into your QB Self-Employed account.
What is the QuickBooks Self-Employed Login Procedure for IOS Devices?
QuickBooks Self-Employed app is available on the app store and can be downloaded through the app store.
The steps to get and log in to QBSE are given below:
- Step: Launch the App Store on your iPhone.
- Step: Search the App Store for the QuickBooks Self-Employed App.
- Step: Proceed with the on-screen steps to download and install the application.
- Step: After your installation is finished, wait for it to finish before tapping it to start it.
- Step: Type in your user ID and password in the necessary fields.
To use your self-employed account on your mobile device, use the Sign-in Button. You can also use the Biometric option for Signing in for privacy purposes.
eBetterBooks: Quick Fixes
- Issue: The login link has expired.
Quick Fix: Use a Different Login link.
- Issue: Excess chase and temp data.
Quick Fix: Clear all the cache and temp files.
- Issue: Browser extensions are hindering the login processes.
Quick Fix: Turn off all browser extensions.
- Issue: DNS is causing this error.
Quick Fix: Flush your DNS using the command prompt. - Issue: QuickBooks self-employed app
Contact for QuickBooks Self-Employed Support
Hopefully, the above solutions will help you overcome the Unable To Login QBSE error. But if you still need help sending email invoices or professional assistance, immediately contact our customer service to avoid any inconvenience.
Implement the solutions given above to resolve the error; if you need help is available at 1-802-778-9005, or you can mail to us at: support@ebetterbooks.com
What To Do if QuickBooks Self-Employed Login Error Occurs?
You may need help accessing the QuickBooks Self-Employed during the login process. Many reasons can lead to the login issue in QBSE. So, below are multiple tested solutions that can help you fix the issue while logging in.
Solution 1: Use a Different Login link
If you can’t log in to QuickBooks using the sign-in link you’d normally use, use an alternative link. Visit https://qbo.intuit.com or https://quickbooks.intuit.com/sg/ and see if you can sign in.
Solution 2: Comply With a Few Manual Steps
You can sometimes resolve this problem by making manual modifications.
Some of the main manual fixes for the Self-Employed Login Problem are listed below:
1. Add QuickBooks as a Trusted Site: Verify your browser’s privacy settings and add QuickBooks as a Trusted Site.
2. Restart your Computer: Restarting your OS will help restart the background processes causing the sign-in problems.
Solution 3: Try using private browsing mode
Launch a new tab in your browser and select More Choices. Check your ability to log in by opening a fresh Incognito window. If you can access your account, your extensions and cache probably interfere with the scripts that QuickBooks is attempting to run on the page. Turn off your extensions, clear the cache, and then review the outcomes.
Solution 4: Clear all the Cache and Temp Files
Navigate to the History tab of your browser. Select History, then click Delete browsing data. This will delete your cache and cookies. Then, examine the outcomes after clearing your cache and the most recent temp files.
Solution 5: Turn off Your Extensions
Choose the Extensions option by clicking on More options from the Menu option. A list of all the currently installed extensions on your browser should appear. Turn them all off, launch a new tab, and see whether the error has been rectified.
Solution 6: Clear/Flush Your DNS
You can fix your login issue by clearing your DNS.
The steps to flush your DNS are as follows:
- Step: Close your browser and all other ongoing processes.
- Step: Launch the Command Prompt with administrator rights.
- Step: Type in the ipconfig /flushdns command and press Enter.
- Step: Restart your browser, then quit Command Prompt before attempting to log into QuickBooks.
Solution 7: Contact for QuickBooks Self-Employed Support
You have the option to reach out to QuickBooks Self-Employed Customer Support.
Follow these steps to connect with a live representative:
- Click on the ‘Assistant’ option in the top corner.
- Select ‘Talk to a Human.’
- Then click on ‘I Still need a Human.’
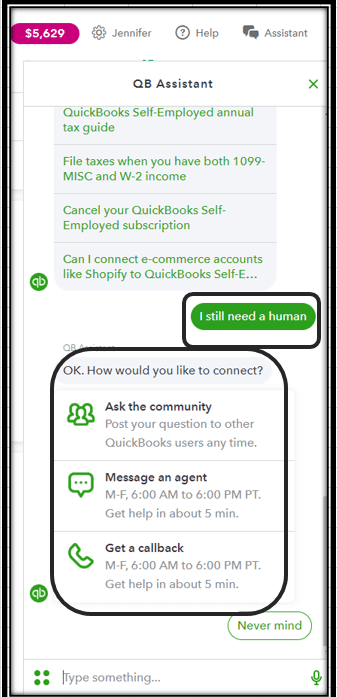
If you’re having trouble when signing in to your Intuit Account, below are the steps to sign in even if you lost or forgot your user ID or password, or recover your account if you can’t get a verification code.
Let’s have a look:
What to Do If I Forget My Password?
If you forgot your user ID or password, but can use your phone or email on file, you can still get into your account. This is the fastest way to access your account if you lost or forgot your login credentials.
Step 1: Navigate to the sign-in help page.
Step 2: Enter the phone number, email address, or user ID for your account.
Step 3: If you type a phone number or email address, we’ll send you a text or email with a verification code. If you enter a user ID, select which method you prefer.
Step 4: Write down the verification code we sent, or follow the instructions in the message. We may ask you for a little more info to make sure it’s really you.
Step 5: When you’re prompted, reset your password. Or, you can click Skip.
When you return to your account, you can change the email address, phone number, password, or go right to your product. If you haven’t already, we suggest you add your phone number to your account. This way, you can get your verification codes in the future when you try to sign in.
Note: You have 24 hours to use the password link. The link expires after 24 hours.
What to Do if I’ve Lost Access to My Phone or Email Address?
If you lost or forgot your user ID and password, and no longer have access to your phone or email on file, you can use the account recovery form in this section. Your request will be processed within one business day. Our business hours are M-F, 8 AM to 5 PM PT.
For your security, you can only make changes to your Intuit Account. Our support team doesn’t have access to update or modify your account information.
Step 1: Take a high-quality photo or scan of your driver’s license, state ID, passport, or other government-issued ID. You can also use a notarized document with your name and address.
Step 2: Fill out the form below with your info, and upload your ID or document.
Step 3: Within one business day, look for an email from no_response@intuit.com with the next steps. If your request will be approved, you receive a link to reset your password.

Account Recovery Request Denied Due to Name Mismatch (Email Instead of First and Last Name)
If you are the primary admin and are unable to log in to the account and you have submitted an account recovery request but got declined due to the name on the account does not match the photo ID submitted (username on the account is an email address), then follow the steps below:
Step 1: Create a new login through accounts.intuit.com.
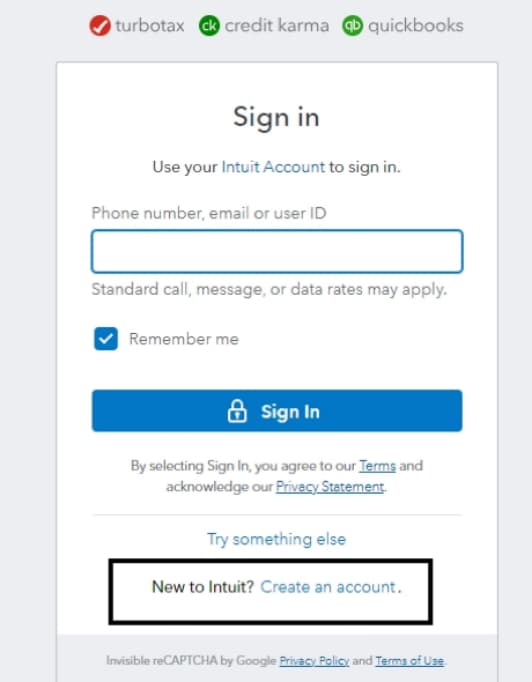
Step 2: When you’ve created a new login, move to Quick actions and then click on Change name.
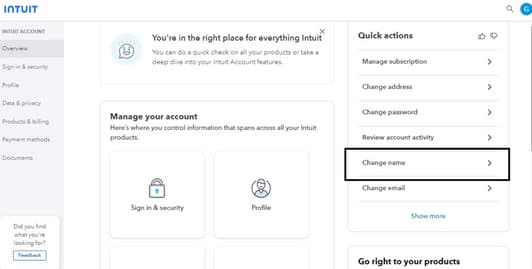
Step 3: Type your First name and Last name, and then press Save.
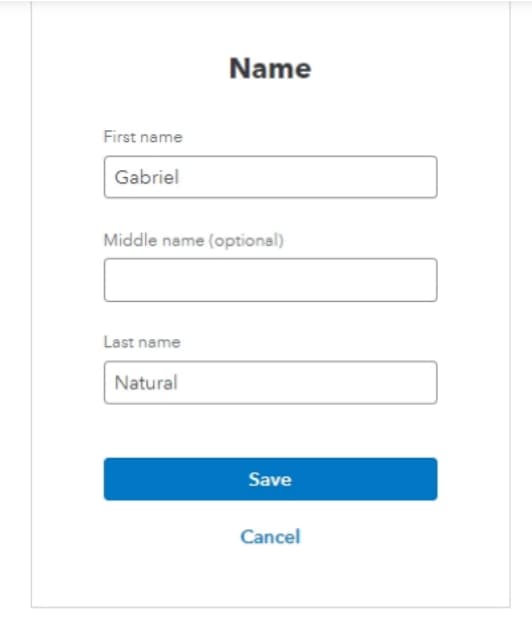
Step 4: After adding your first and last name, check twice that the information has been saved correctly by refreshing the page and checking your profile settings.
Step 5: Once you create a new login and confirm your first and last name, navigate to Request to be the Primary Admin or Contact (intuit.com). Make sure you have all the documents outlined in this article before continuing.
Step 6: Choose to Request Primary Administrator Update when you have all the documents.
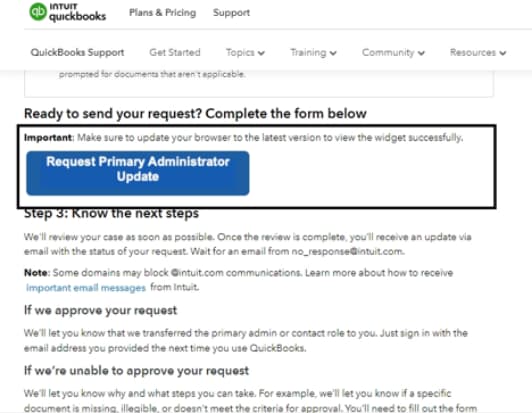
Note: No issue if the new login is not registered as a user on the account you want to recover. You will be asked which company you want to recover during the Business Change Request (Request to be primary admin) process. Our internal team will review the documents you upload with the new login you created to match the business information.
Step 7: When you have successfully submitted the request with all the required documents, you ‘ll get a response within 5 business days. However, there may be occasional delays, and it may take up to 10 business days for us to get back to you. If you have not heard from us within this time frame, please feel free to contact us.
Other Sign-in Issues
I didn’t get a text, email or phone call with my verification code
It can take a couple of minutes for your code to arrive. Here are what you can do:
- Step: Check your junk mail or spam folder to see if the email went there.
- Step: Review all email addresses you might’ve used to sign up for your account.
- Step: Unblock or add Do_not_reply@intuit.com as an approved sender in your email app.
- Step: You can get a new code sent to you by choosing the I didn’t get a text, I didn’t get an email, or I didn’t get a phone call link on the product sign-in page.
- Step: If you lost your phone, check your text messages online at your cell carrier’s website.
- Step: You may have accidentally blocked the phone number we sent a text message from. Make sure to allow or unblock our numbers 88811 and 97962 on your iOS or Android device.
My Verification Code isn’t Working
If you entered the exact code that was sent to you and it didn’t work, it may be because of generating multiple codes and not using the most recent one.
Try these tips to verify your account:
- Step: If your code doesn’t work, request another code by choosing I didn’t get an email or I didn’t get a text message.
- Step: Delete any previous codes we sent you to ensure you use the most recent code.
- Step: Keep the window with the code entry form open. Closing the window invalidates your code, meaning you’ll need to start over from the sign-in page to create a new code.
- Step: Check your email in a new tab or window to keep the verification code page open at the same time.
What if the Password Reset Doesn’t Work?
If you’re signing in using a web browser, clear your cache and cookies to get rid of any pre-filled passwords. Also, clear any password managers or system settings with saved passwords for the site. Make sure to close and reopen your browser before you sign back in to your account. If you’re using the app on your phone, close and re-open it to see how it’s working.
What to Do If I Don’t Have a Login?
- Step: Navigate to the sign-in page and then select Create an account from there.
- Step: Choose an appropriate plan and follow the next steps.
- Step: Type your email address, mobile number, or other fields as prompted.
- Step: Create a password, then click on One more step.
- Step: Follow the on-screen steps to complete billing and payments so that you can get started.
I Was Invited to QuickBooks But Unable to Sign in
You may be asked to sign in if you have a user ID with your invitation. However, if not, you’ll have a link to create one with the email address the invite was sent to. Once you’ve created a user ID, you’ll be able to sign in.
Unable to Log into the CAMPS
The Customer Account Management Portal (CAMPs) uses the same email address that you register with your product. This may be different from what you used to sign in your company file. If the email you used to register your product was not already linked to an Intuit account, an account was automatically created for you. So, if you have never signed in then you may need to claim that account or if you have multiple you may need to merge the accounts.
You may try to sign in to camps.intuit.com and get a message saying, “Something went wrong… It’s not you. It’s us”, or you constantly loop back to the sign on screen. For this, you can switch to an incognito or private browser.
Here’s how:
Microsoft Edge:
- Open Edge.
- Press and hold Ctrl + Shift + P to switch to In Private Browsing.
- Navigate to camps.intuit.com and log in.
Mozilla Firefox:
- Open Firefox.
- Press and hold Ctrl + Shift + P to switch to Private Browsing.
- Move to camps.intuit.com and log in.
Google Chrome:
- Open Google Chrome.
- Press and hold Ctrl + Shift + N to switch to an Incognito window.
- Go to camps.intuit.com and log in.
Safari for Mac:
- Open Safari on Mac.
- Press and hold Command + Shift + N to enable Private browsing.
- Head to camps.intuit.com and log in.
Wrapping-Up!
Hopefully, the above solutions will help you overcome the Unable To Login QBSE error. But if you still need help sending email invoices or professional assistance, immediately contact our customer service to avoid any inconvenience.
Implement the solutions given above to resolve the error; if you need help is available at 1-802-778-9005, or you can mail to us at: support@ebetterbooks.com
FAQs:
Can I use the same Intuit login credentials for both QuickBooks Self-Employed and TurboTax?
Yes. QuickBooks Self-Employed and TurboTax are both products under the Intuit umbrella, and they utilize a unified Intuit Account. You use the exact same email address and password (the Intuit User ID) to log in to both QBSE and your TurboTax account. If you update your password in one service, it will automatically update for the other.
What should I do if I cannot receive the Two-Factor Authentication (2FA) code during login?
If you have trouble receiving the 2FA code (often via text or email), you should first check your spam/junk folders and confirm that your registered phone number or email address is correct on your Intuit Account profile. If the issue persists, Intuit support provides an option to use a backup recovery method (like a recovery phone number or alternate email) or to verify your identity through a security question to regain access.
How do I manage my bank connections if I am logged in but my transactions aren’t updating?
If you are successfully logged in but your bank transactions are not pulling into QBSE, this is an issue with the Bank Feed connection, not the login itself. You need to navigate to the “Gear Icon” or “Banking” tab within QBSE. Look for the specific bank account, and usually, there will be an option to “Reconnect” or “Update Sign-In Info”. This often requires re-entering your bank’s online banking credentials to refresh the secure link.
Is there a dedicated mobile app for QuickBooks Self-Employed, and does it use the same login?
Yes, there is a separate and dedicated QuickBooks Self-Employed mobile app available for both iOS and Android devices. It is crucial for self-employed users for features like mileage tracking and receipt capture. You must use the exact same Intuit User ID and password that you use for the web browser version to log into the mobile app.
What is the correct way to enter a deposit into QuickBooks Self-Employed?
The process for entering a deposit in QuickBooks Self-Employed is shown below:
➜Step: Click Add Transaction from the Transaction menu.
➜Step: Include the sum and description.
➜Step: Select a choose category option in the menu.
➜Step: If you have a receipt, drag and drop it.
➜Step: Click Save and exit.
For Whom is QuickBooks Self-Employed Targeted?
QuickBooks Self-Employed is specifically created and designed for self-employed people working as freelancers or private contractors.
Following is a list of self-employed people who could benefit from QBSE:
➜If you own and operate a firm as a sole proprietor or an independent contractor.
➜If your work comprises a partnership or company.
➜If you are required to submit Schedule C and pay business taxes on Form 1040.
Can invoices be sent with QuickBooks Self-Employed?
Yes. Using QuickBooks Self-Employed, you can create, track, and send invoices from your mobile app.
Does QuickBooks Self-Employed have an app?
Yes, QuickBooks Self-Employed includes a mobile app, available for free on both iOS and Android devices. Current subscribers can download and use the app at no extra charge.
I forgot my password. Is the ‘Forgot Password’ link sent to my secondary email?
The official Forgot Password link, when initiated on the Intuit login page, is typically sent to the primary email address associated with your Intuit Account for security reasons. While you may have a recovery email on file, the initial reset link targets the primary email. If you don’t receive it, you may need to use the “I don’t remember my email or phone number” option on the recovery screen.
Disclaimer: The information outlined above for “Steps to Login QuickBooks Self Employed & If Unable To Login QBSE How To Fix That Error” is applicable to all supported versions, including QuickBooks Desktop Pro, Premier, Accountant, and Enterprise. It is designed to work with operating systems such as Windows 7, 10, and 11, as well as macOS.

