Encountering issues while adding multiple items to the QuickBooks payroll item list, makes it difficult for users to manage the employees’ payroll.
This article will help you to overcome all the issues that are making it challenging to manage employee payroll efficiently.
Employees sometimes need to pay for things like retirement contributions, health insurance, uniforms, tools, or other dues. To track all such deductions & expenses, it’s important to maintain a payroll items list.
What is a QuickBooks Payroll Item List?
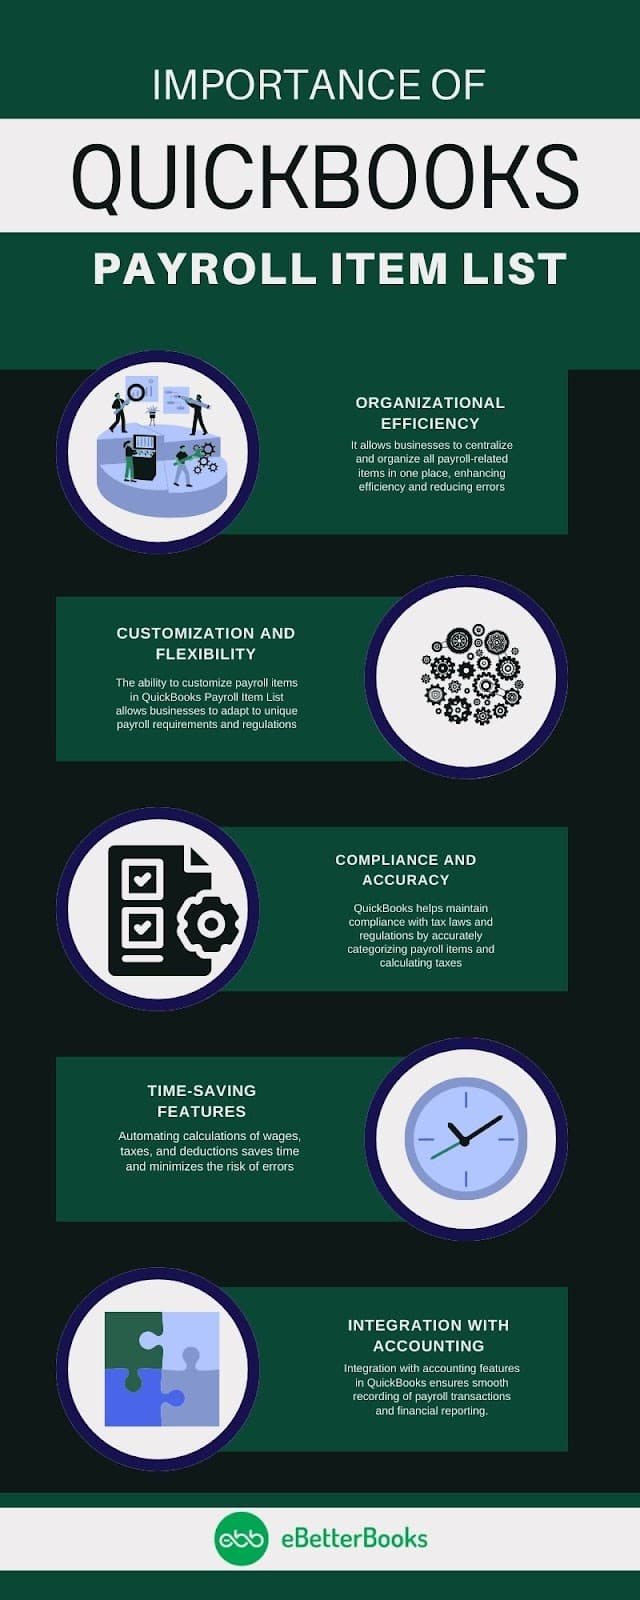
QuickBooks Payroll Item List provides a comprehensive and detailed record of all the items that are used to evaluate the exact pay of an employee.
This list usually includes compensation, taxes, other additions and deductions, and employer-paid expenses which are mandatory to calculate the wages, withholdings, and other payroll components correctly.
QuickBooks tracks individual amounts on a paycheque and collects year-to-date wage and tax amounts for each employee using a payroll item list.

A Guide to Set Up a Payroll Item List in QuickBooks Online!
To accurately manage the payroll item list in QuickBooks Online it is significantly important to set up the employee compensation, taxes, deductions, and other expenses correctly.
This guide will walk you through the steps:
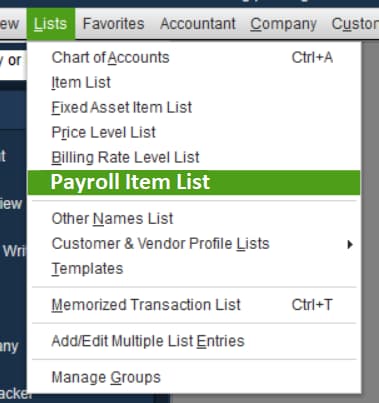
- To start the process, navigate to the Lists menu and choose Payroll Item List.
- Now, hit the Payroll Item list and press New from the drop-down menu.
- Select EX Setup and then click the Next button.
- After this, choose the item you wish to configure.
- Press the Next button and then adhere to the on-screen instructions to input the information required for the Type of item you have chosen. Each item has different requirements that are applied to specific groups of individuals.
- Hit the Finish tab and assign the payroll item to each employee using Employee Center.
By default, if the QuickBooks payroll feature is turned off.
To enable it, do the following:
- Initially, select Preferences from the Edit menu and then click Payroll & Employees in the left panel.
- Hit the Company Preferences tab and choose Full Payroll.
- Press the OK button at the end.

A Brief of How to Manage and View the Missing QuickBooks Payroll Item List
Following are the steps that can be followed to view the missing payroll item list in QuickBooks:
- To manage your missing details of the QuickBooks Payroll Item list, open your QuickBooks, and check to ensure that payroll services are turned on.
- Then go to the employees tab and select payroll services.
- You will now see an option of “manage services”.
- Make sure that your payroll services are active.
After this, Ensure you’re receiving payroll updates by selecting Employees > Get Payroll Updates, then click Update and reopen the same page again.
Before moving ahead, make sure you have created a backup by hovering over the file icon and choosing “Create Backup” to ensure all data is safely preserved. Once the backup is finished, manage and organize the list, then restore the company data to view the missing QuickBooks item list.
Troubleshoot: QuickBooks Payroll Item List Missing
If you are unable to find the missing QuickBooks Payroll Item List, first make sure that you have the full payroll features selected in your preferences. After this, perform the below-given steps to get your missing payroll item list back within a while.
Solution 1: Download the latest Payroll Tax Table
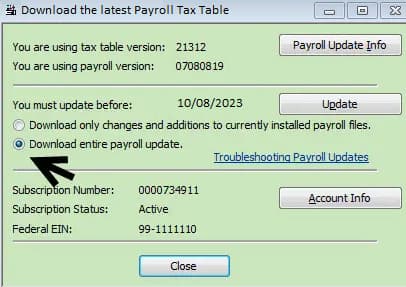
- Head to the Employees menu and then click on Get Payroll Updates.
- Now, select the Download Entire Update checkbox.
- Choose Download Latest Update. An informational window starts appearing on your screen once the download is complete.

Solution 2: Verify Your Company’s Data
- To begin with, navigate to Window and then click on Close All.
- Now, hover over File and select Utilities.
- Hit the Verify Data tab.
If you see:
- QuickBooks detected no problems with your data—your data is clean, and you are not required to do anything else.
- An error prompt—look for it on our QuickBooks Desktop customer site for how to deal with it.
- Your data has lost integrity—Data damage was found in the file. Rebuild your data to resolve it.
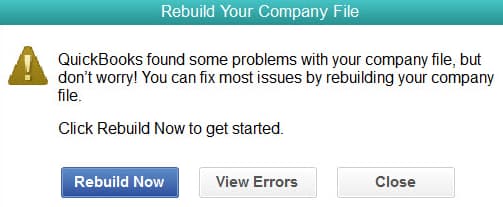
Solution 3: Rebuild Your Company File Data

- First, go to File, Utilities, and then choose Rebuild Data.
- You’re prompted to create a backup before it recovers your company file. Press OK. A backup is required when you rebuild.
- Select where you’d like to save your backup, then hit the OK tab. Avoid replacing another backup file.
- After this, type a new name in the File name and click Save.
- Choose OK once you get the message Rebuild has completed.
- Furthermore, navigate to File, select Utilities, then click Verify Data again to check for additional damage.
- If the verification finds more damage, you must fix it manually. Look for the error(s) in the qbwin.log on the QuickBooks Desktop Customer Helpdesk to fix it.
- You need to restore a recent backup if the error can’t be noticed. For this, hover over the File and choose Open or Restore Company.
- Always remember that you don’t replace your existing company file. You must enter the info into your company file again since the backup was created.
Add, Edit, or Delete QuickBooks Payroll Item List!
Below we will discuss how to add, edit or remove payroll item lists in both QuickBooks Desktop and Online.
So let’s get started following the steps one-by-one:
For QuickBooks Desktop
Steps to “Add” to the payroll item list in QuickBooks Desktop:
- In the first place, navigate to Lists and then choose Payroll Item List.
- Now, click the Payroll Item drop-down, then hit the New tab.
- Select Custom Setup and then press Next.
- After this, choose Deduction, then click Next.
- Type the name of the deduction and hit the Next tab.
- If applicable, select the plan administrator’s name or add it and the account number. Then, click Next.
- Moving ahead, choose the most relevant Tax tracking type. Hit None if the deduction is after-tax.
- Press Next three times. Choose net pay in the Gross vs. Net window for the None tax tracking type and then hit the Next icon.
- Leave the Default rate and limit areas blank unless it applies to all your employees. You must add the rate and limit when the item is added in the employee profile.
- Finally, click the Finish icon.
Steps to “Add” to the pPayroll Item List in QuickBooks Online:
- Hover over the Employees menu, and then choose the Employee Center.
- After this, click on your employee name twice
- You will now get to edit the Payroll Info.
- Try to figure out the area that is under the column of the item name.
- Choose the payroll item list from the drop-down arrow.
- You will see the annual rate column, add the rate of employees on an hourly basis.
- Press the OK button.
Steps to “Edit” to the Payroll Item lList in QuickBooks Desktop:
- Navigate to the Lists menu and then choose Payroll Item List.
- Hit right-click on the selected item and then choose the Edit menu of the Payroll Item.
- Now add the right tracking type after selecting the next two times.
- Now choose the right taxes after going to the next.
- Press select to choose the “calculate based on quantity”.
- Add a limit type
- Press Finish to save.
Steps to “Edit” to the Payroll Item List in QuickBooks Online:
- Open the payroll account in QuickBooks and select Employees.
- Now choose the payroll item list along with the names of the employees
- Now, click on to edit option to make all the changes.
- Edit the amount or limit.
- Hit the OK tab.
Steps to “Delete” to the Payroll Item List in QuickBooks Desktop:
- Click on the menu bar and press on the Employee menu option.
- Now select payroll center and then select the pay employee.
- Now you have to check the payroll field option and click on the payroll
- Choose from the payroll item list you want
- Press the delete button, it will pop up a confirmation message
- Hit yes and save it.
Steps to “Delete” to the Payroll Item List in QuickBooks Online:
- Hover over Payroll and then click on Employees.
- Choose your employee.
- Select Start or Edit from Deductions & Contributions.
- Hit the trash bin icon beside the deduction you want to remove.
- Again navigate to the homepage of QuickBooks Online
- Select the employees’ section to choose the particular name of the employee.
- Select the edit option just beside the deduction element
- Based on the deduction element choose the trash bin icon.
- Press Delete, then click Done at the end.
Ending-Up!
Thus, we can conclude that you’ll now be able to find your missing QuickBooks Payroll Item List after going through the steps described above.
FAQs!
If I have an inactive payroll item, should I delete it instead of keeping it?
Intuit strongly advises against deleting any payroll item that has ever been used on a paycheck, even if it is no longer active.
➜Data Integrity: Deleting an item that has a history in your company file can cause reporting inaccuracies and potentially corrupt the historical payroll data.
➜Best Practice: Always make the item inactive instead of deleting it. Inactive items are hidden from new transactions but remain in the system for historical reporting and paycheck viewing.
How do I make sure a new payroll item for a pre-tax deduction correctly reduces taxable wages?
When setting up a new pre-tax deduction (like a Section 125 plan or 401(k)), the key is to ensure the “Tax Tracking Type” and the “Taxes” settings are configured correctly during the item setup interview.
➜Tax Tracking Type: Must be set to the appropriate pre-tax category (e.g., “401(k)” or “Section 125, Flex Spending”).
➜Taxes Setting: In the next step of the wizard, you must ensure that the box is unchecked for the taxes you want the deduction to reduce (e.g., Federal Withholding, Social Security, Medicare). Leaving the box unchecked tells QuickBooks not to calculate that tax on the deducted amount.
Yes. payroll-related lists (items, wages, taxes) are sensitive structures within the company file. Minor data corruption might affect payroll data specifically without impacting items like vendors or customers.
How often should I update QuickBooks’ payroll tax tables to ensure the payroll item lists function properly?
It is recommends downloading the latest payroll tax table regularly. Outdated tax tables can cause payroll-related inconsistencies in calculations and item behavior even if the list itself appears complete.
What should I do if a payroll item’s tax table rate seems incorrect after an update?
If the tax amount calculated for an item (especially a company contribution item like SUI or a tax deduction) appears incorrect immediately after a payroll update, you should first re-verify the tax table download.
Re-Verification Steps (QuickBooks Desktop):
➜Go to the Employees menu and select Get Payroll Updates.
➜Check the box to Download entire update.
➜Click Download Latest Updates.
➜If the Issue Persists: If the rate remains incorrect after updating, the issue may be with the Company Setup information (e.g., an incorrect SUI rate entered). If the item is a mandatory federal/state tax, contact Intuit Payroll Support, as they manage the tax tables.
Where is the Payroll Item List in QuickBooks?
Go to Payroll, then Employees. Select Edit payroll items. Select Pay types or Deductions & contributions to see your list of payroll items.
How Can I Track the Payroll Items List in QuickBooks?
To track the Payroll Items List in QuickBooks, go to Payroll Item List under the Lists menu (Desktop) or Payroll Settings (Online). Use payroll reports like Payroll Summary or Payroll Item Detail to monitor item usage and employee-specific data.
Disclaimer: The information outlined above for “A Comprehensive Guide to Fix QuickBooks Payroll Item List Missing Issues” is applicable to all supported versions, including QuickBooks Desktop Pro, Premier, Accountant, and Enterprise. It is designed to work with operating systems such as Windows 7, 10, and 11, as well as macOS.
